LC01 ThingsBoard Integration
In this tutorial you will learn in detail, how to integrate Dragino LC01 with ThingsBoard.
Prerequisites
- Dragino LC01
- LC01 registerd and activated with The Things Stack (We use The Things Stack Sandbox for demonstartion)
- ThingsBoard account (We use ThingsBoard EU Cloud)
Creating an intergartion
First, you need to create an integration with The Things Stack. For the integration type, we use MQTT:
- Select the application where you registered the LC01 (Applications > your-application > Application overview).
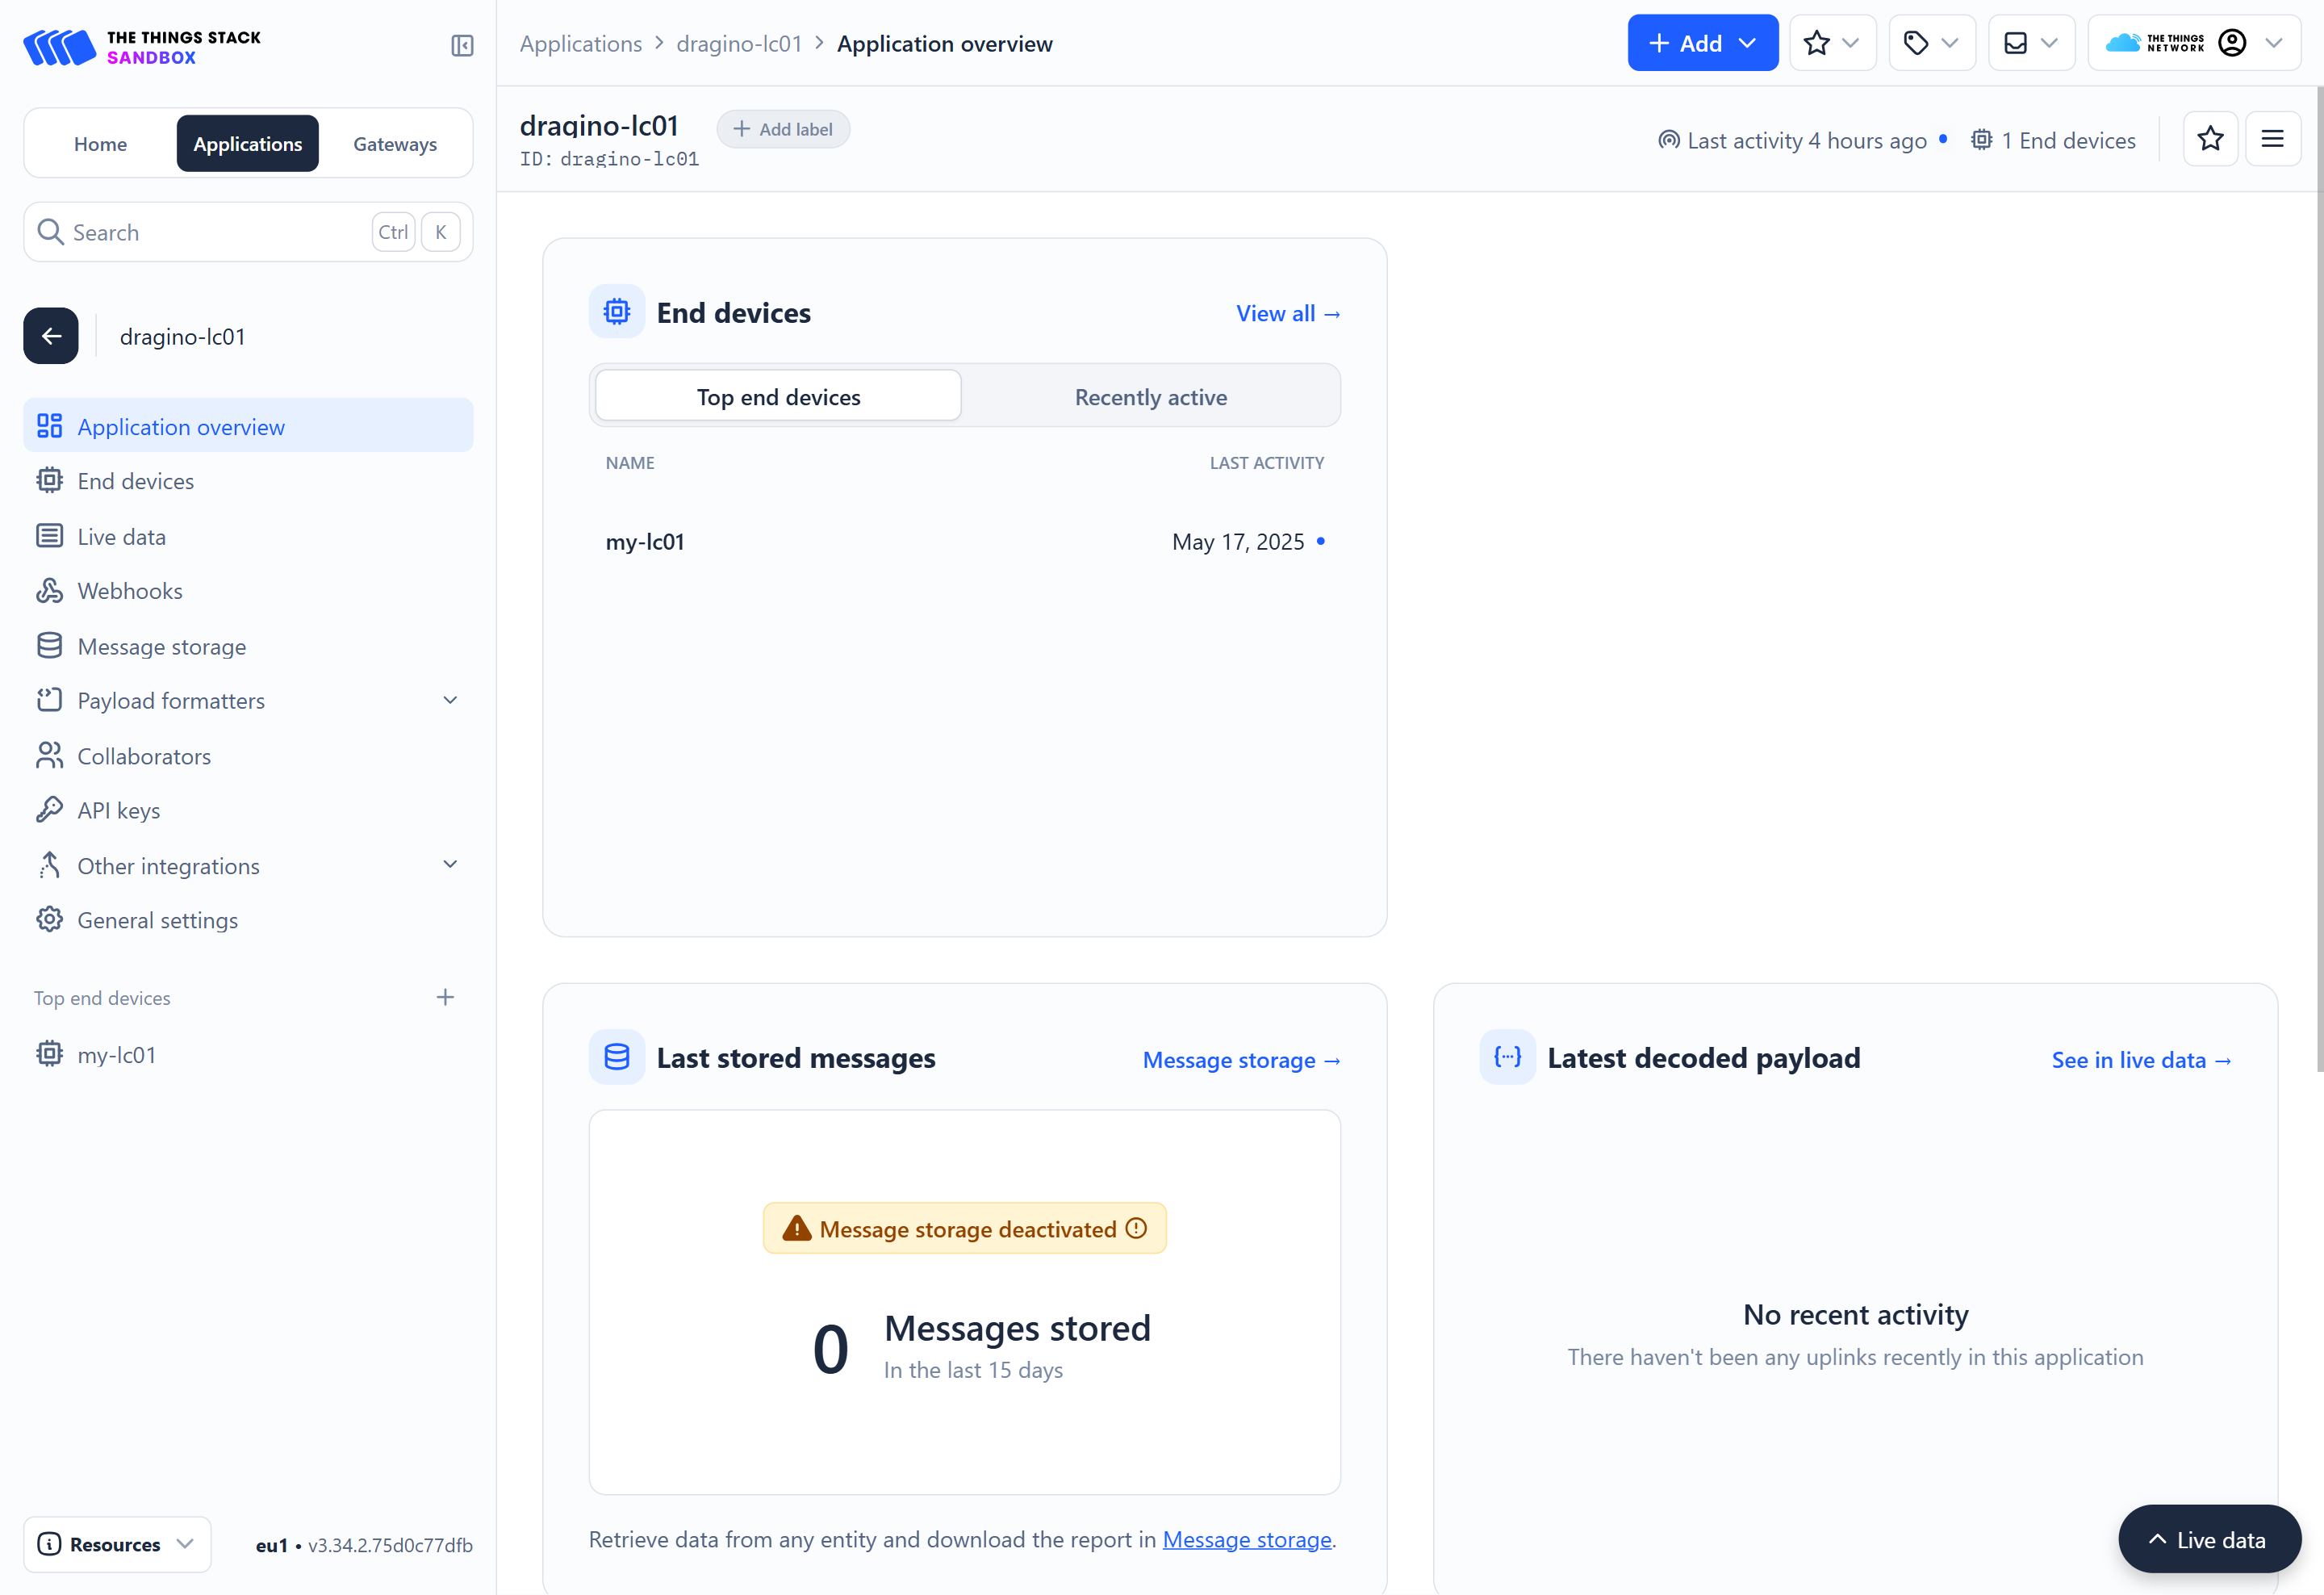
- In the left navigation menu, go to Other integrations > MQTT (Applications > your-application > MQTT).
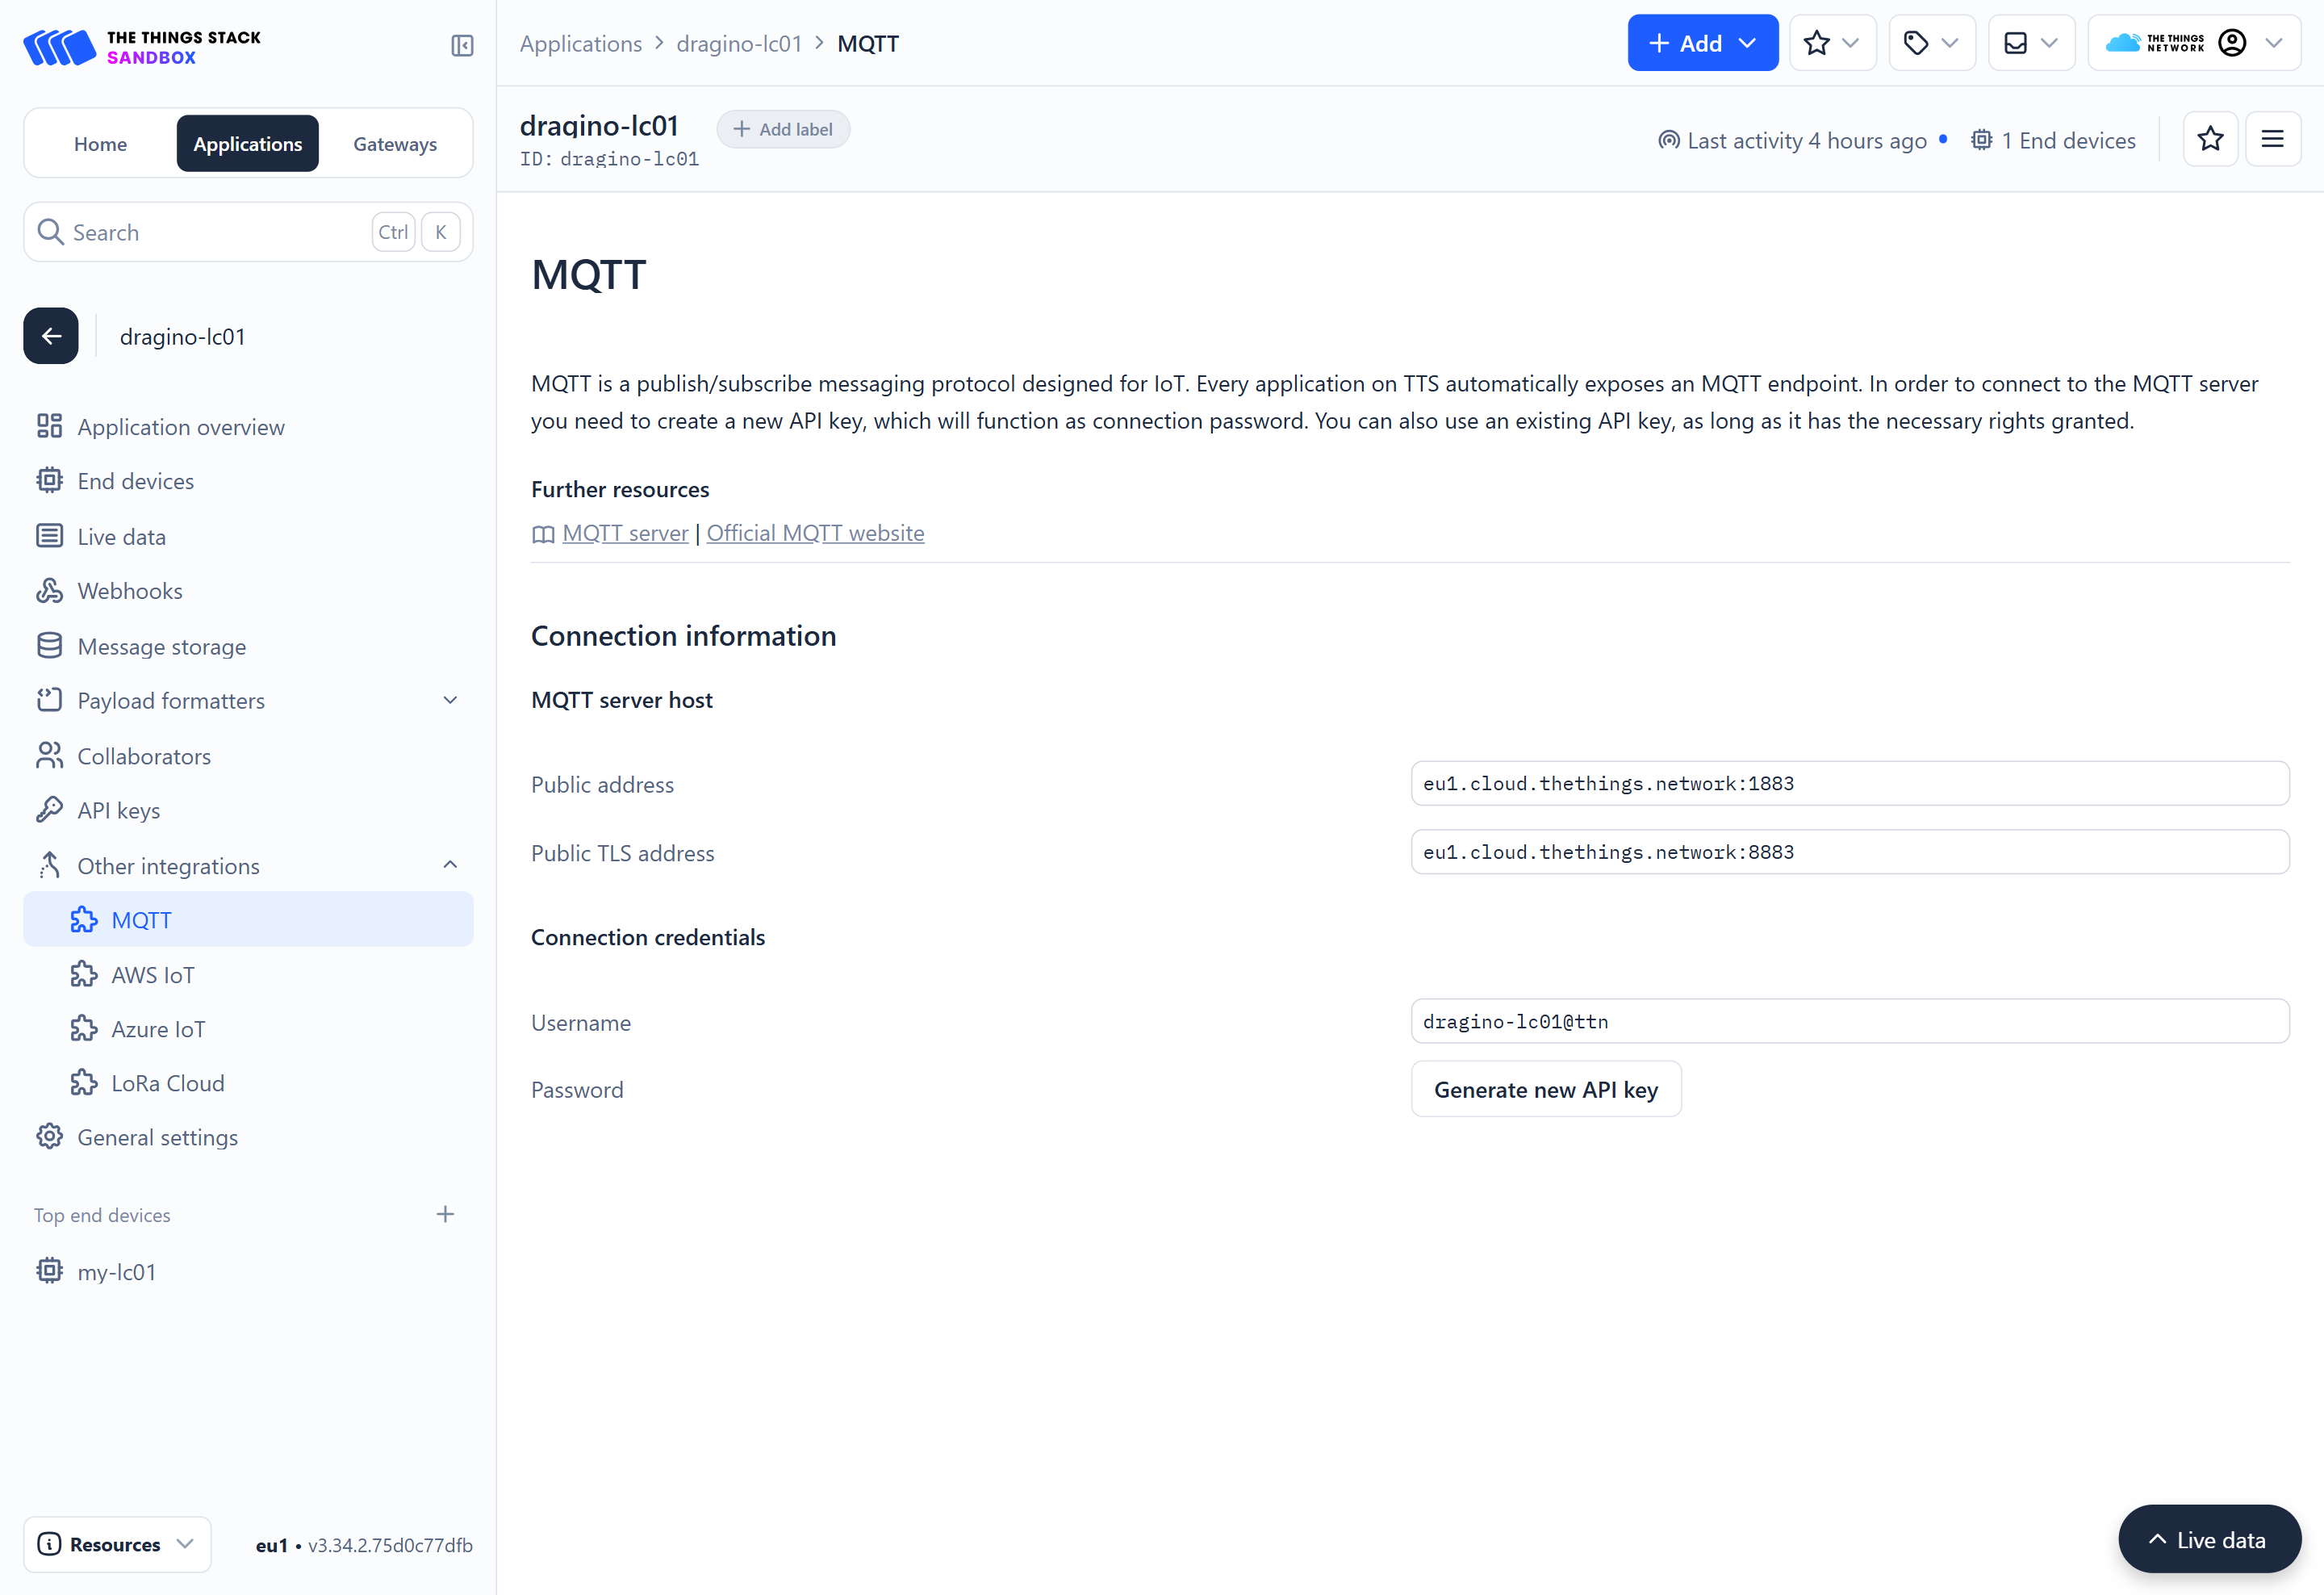
- Under Connection credentials, you can see the Username and Password. Click the Generate new API key button to generate a new API key, which will be used as the password.
Tips
Copy both the username and password into a notepad. You will need this information in the next section.

Now you have successfully configured the The Things Stack side of the integration. Let’s move on to the next section.
Configuring ThingsBoard
The configuration involves several steps:
Creating data converters
Data conveters are used to encode and decode payloads. In ThingsBoard, you have to create two data converters.
- Uplink data converter
- Downlink data converter
First let's create the uplink data converter for LC01.
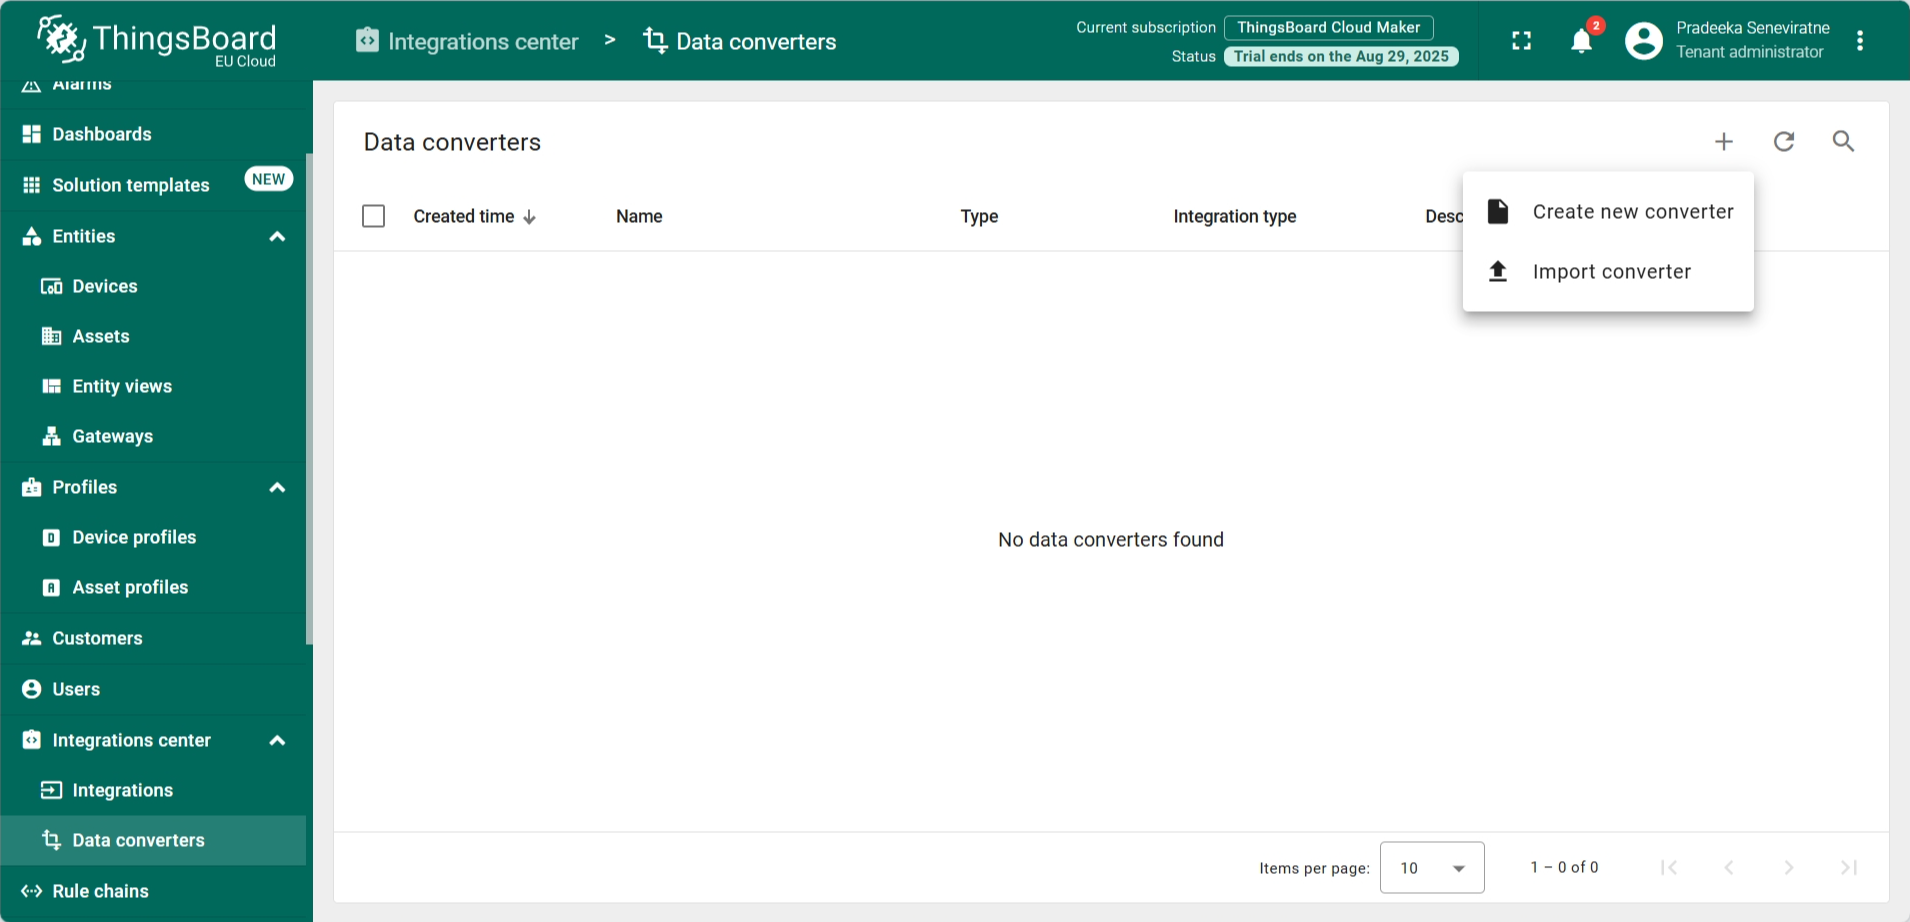
- In the left navigation menu, select Integrations center > Data converters.
- On the Data Converters page, click the Add Data Converter button (the one with the + sign). From the dropdown menu, select Import Converter.
Download the JSON file for uplink data converter for LC01 here.
////Version: 0.1
var data = decodeToJson(payload);
var deviceName = data.end_device_ids.device_id;
var deviceType = data.end_device_ids.application_ids.application_id;
var model = {};
var data2 = data.uplink_message.decoded_payload;
var flg = data.uplink_message.f_port
for (var key in data2) {
    model[key] = data2[key];
}
var obj =  {"devid":deviceName}
var result = {
    deviceName: deviceName,
    deviceType: deviceType,
    telemetry: model,
    groupName: "Case Study",
    attributes:{"devid":deviceName,
        "timevalue":"test",
        "inactivityTimeout":1260000
    }
};
function decodeToString(payload) {
    return String.fromCharCode.apply(String, payload);
}function decodeToJson(payload) {
    var str = decodeToString(payload);
    var data = JSON.parse(str);
    return data;
}
if (flg===2){
return result;
}
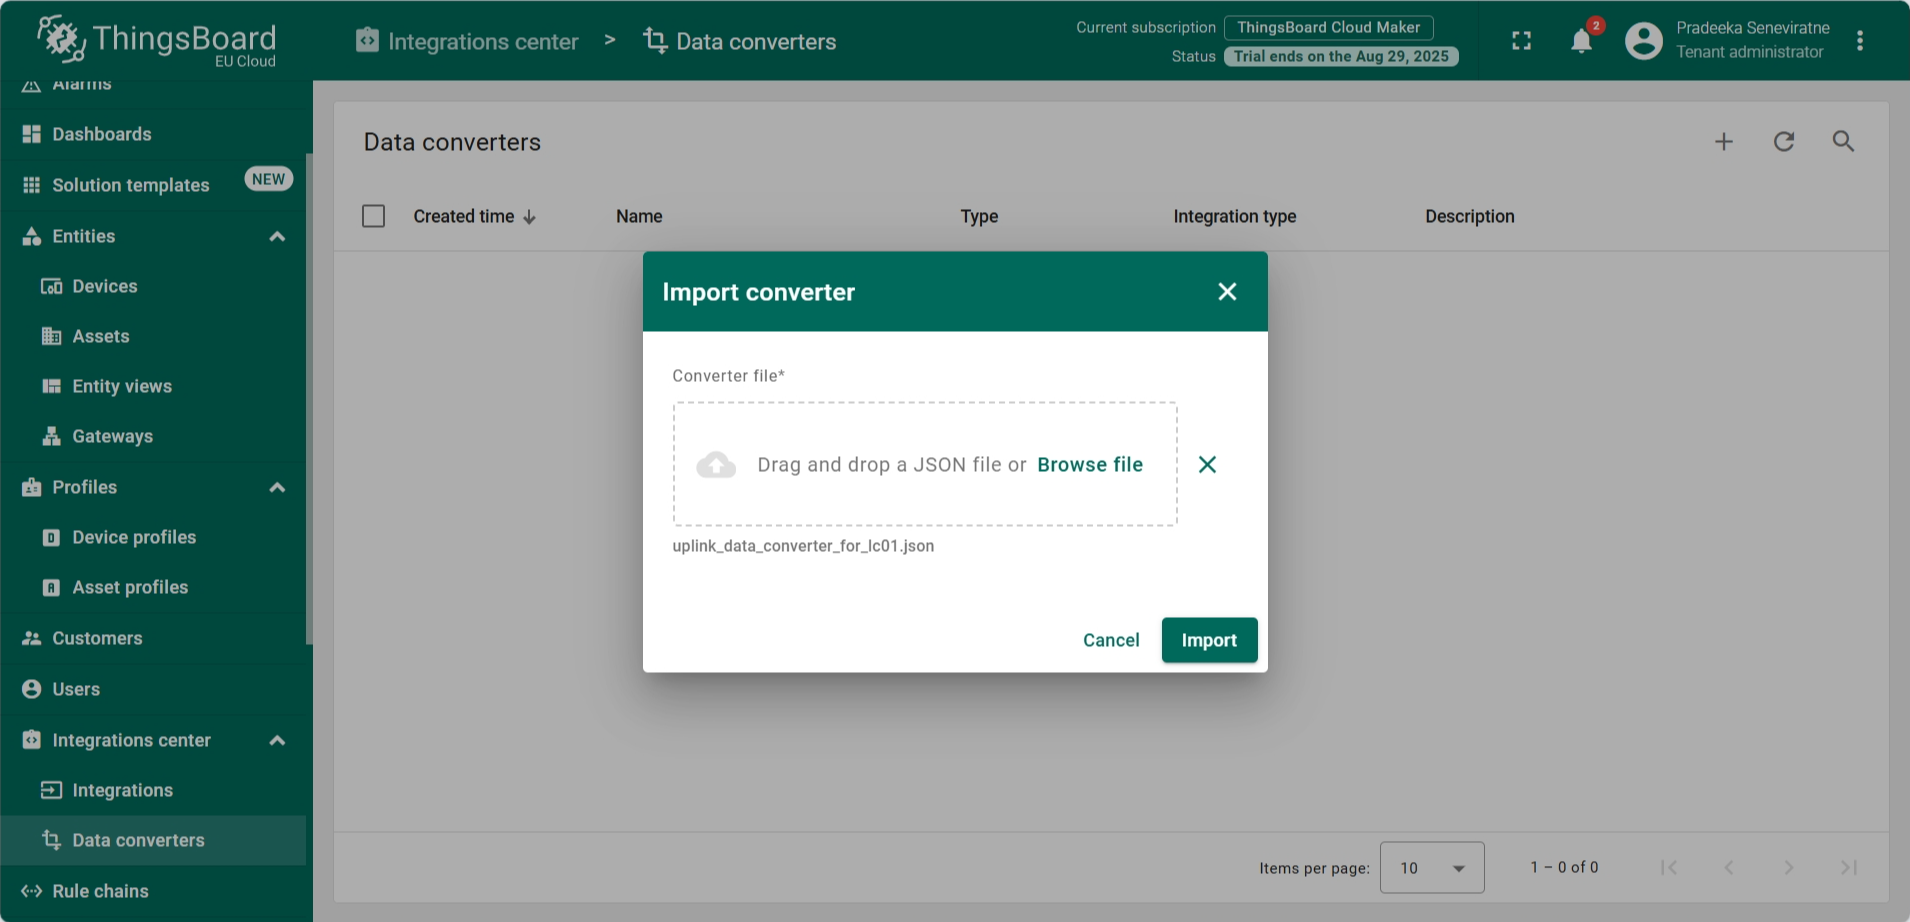
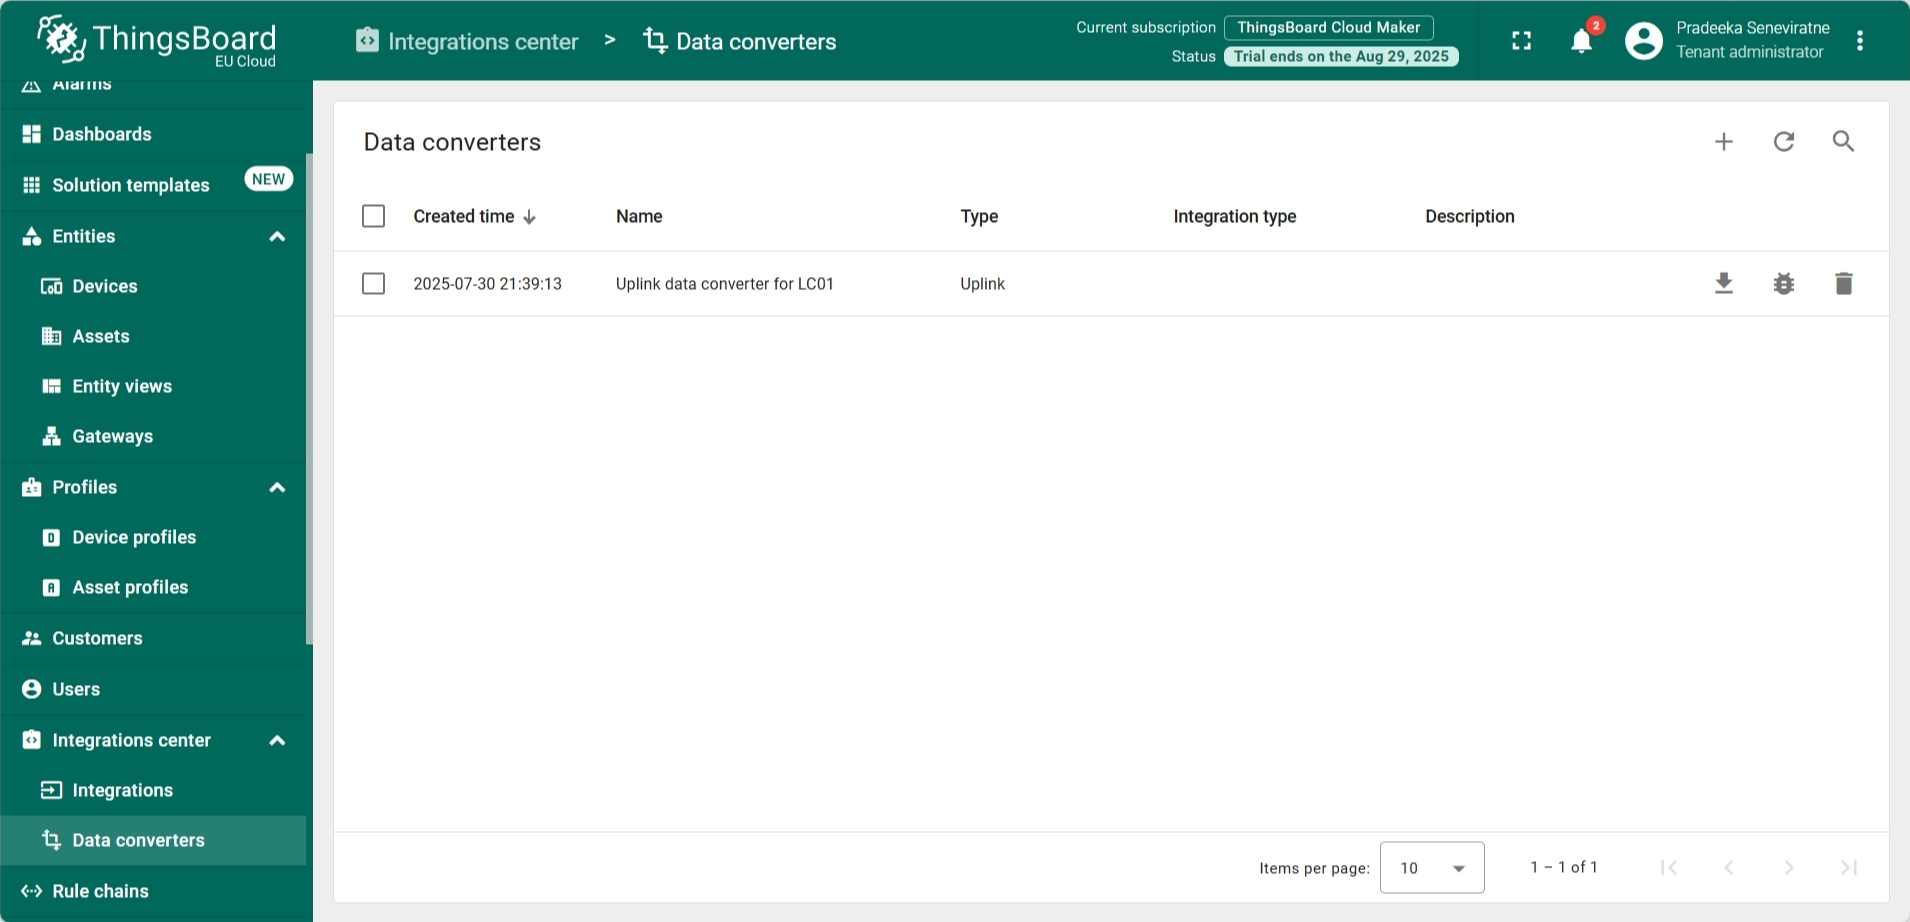
- Browse and locate the downloaded uplink data converter by selecting the Browse file.
- Click on the Import button.
- The uplink data converter has now been added to the Data Converters list.
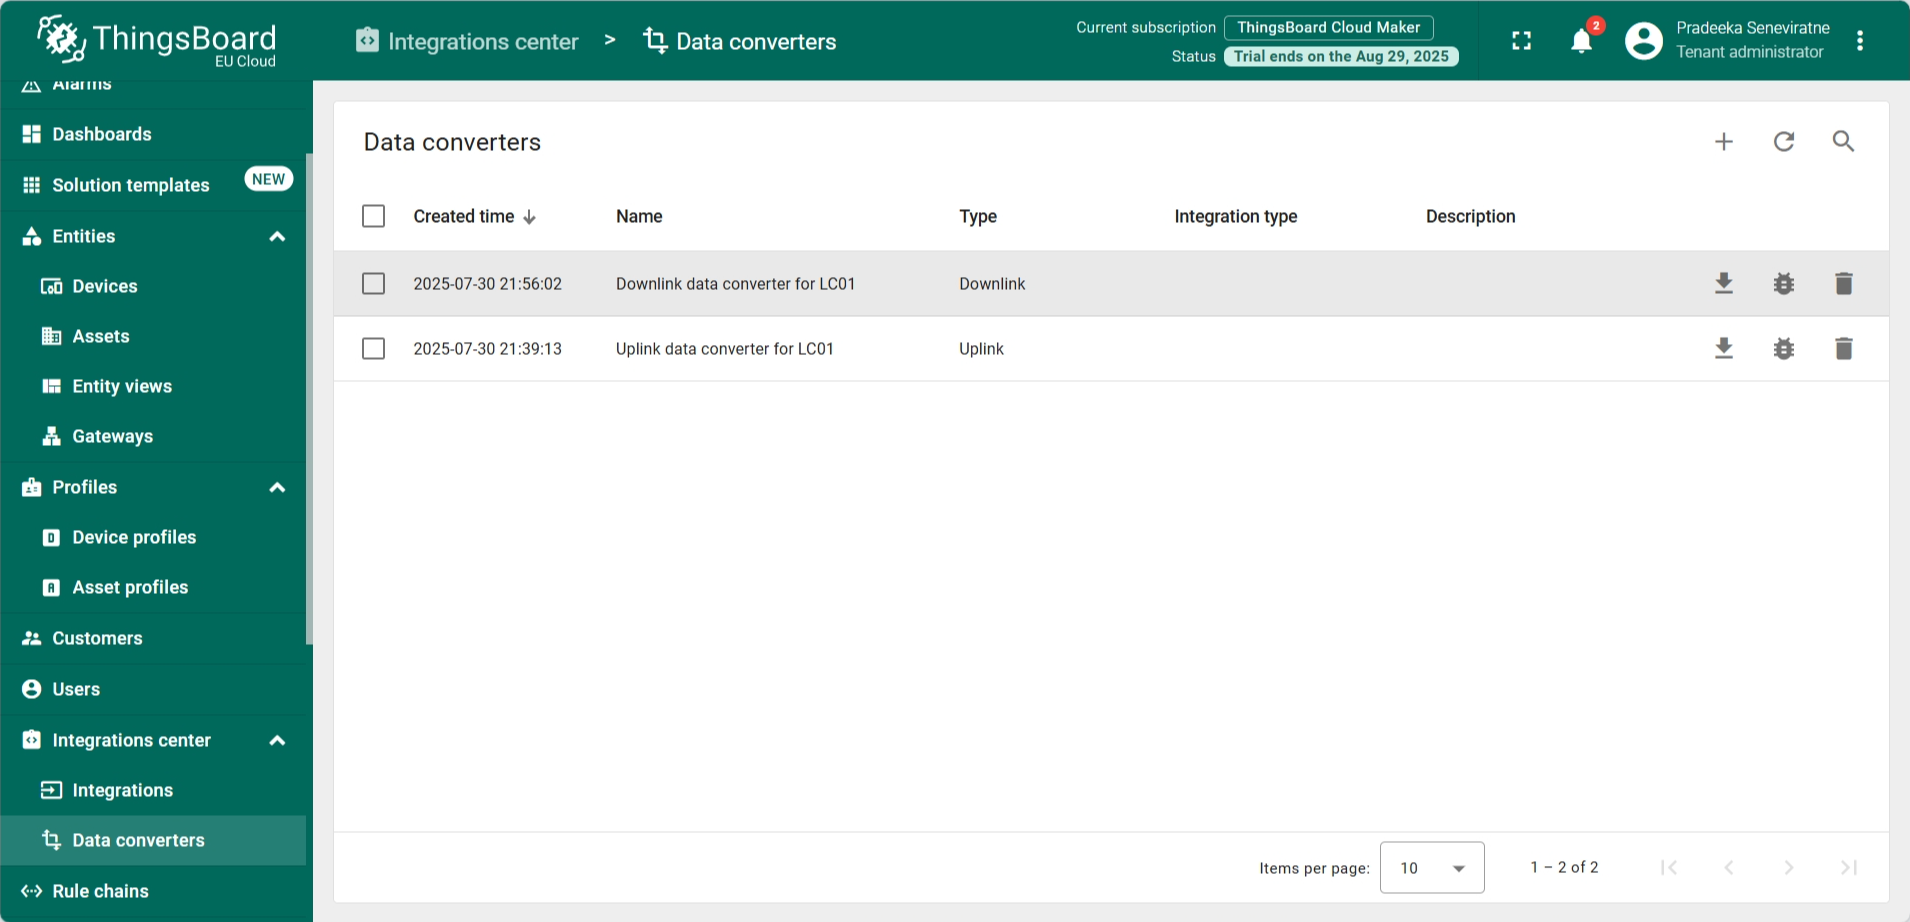
Now import the downlink data converter by following the same steps as above. You can download the JSON file for the downlink data converter here.
function hexToBase64(hexString) {
    var bytes = hexString.match(/.{2}/g);
    var binaryString = bytes.map(function(byte) {
        return String.fromCharCode(parseInt(byte, 16));
    }).join('');
    return btoa(binaryString);
}

// // 将十进制秒数转为 4字节大端十六进制(兼容旧 JS 引擎)
// function to4ByteHexBigEndian(value) {
//     var num = parseInt(value, 10);
//     if (isNaN(num)) num = 0;
//     var hex = num.toString(16);
//     while (hex.length < 8) {
//         hex = "0" + hex;
//     }
//     return hex.match(/.{2}/g); // [cc, dd, ee, ff]
// }

//var flg = "shared_value" in metadata;
var payloadHex = msg.payloadHex;


// //判断逻辑有问题,无法判断是用按钮还是手动
//  var cmdMode = metadata.ss_State || "timed";

//  if (cmdMode === "timed") //本来是relay
//  {
//     var relayState = (metadata.ss_State === "01") ? "01" : "00";
//     payloadHex = "06" + relayState;
//  }
//  else {
//     var inverterMode = (metadata["ss_Inverter Mode"] || metadata["ss_InverterMode"] || "00");
//     var controlMethod = (metadata["ss_Control Methods and Port Status"] || metadata["ss_ControlMethod"] || "00");
//     var latchingTime = metadata["ss_Latching time"] || metadata["ss_LatchingTime"] || "0";
//     var latchingTimeBytes = to4ByteHexBigEndian(latchingTime);


//     // 拼接 payload:09 + aa + bb + ccdd eeff
//     payloadHex = "09" + inverterMode + controlMethod + latchingTimeBytes.join("");
//  }

 var data;
// if (flg === true) {
//     data = {
//         downlinks: [{
//             f_port: 1,
//             confirmed: false,
//             frm_payload: hexToBase64(metadata.shared_value),
//             priority: "NORMAL"
//         }]
//     };
// } else {
    data = {
        downlinks: [{
            f_port: 1,
            confirmed: true,
            frm_payload: hexToBase64(payloadHex),
            priority: "NORMAL"
        }]
    };
// }

var result = {
    payloadHex:payloadHex,
    contentType: "JSON",
    data: JSON.stringify(data),
    metadata: {
        devId: metadata.cs_devid
    }
};

if (metadata.shared_State !== "test" || metadata.ss_State !== "test") {
    return result;
}
- The downlink data converter has now been added to the Data Converters list.
Creating an integration
Now you have to create an integration from the ThingsBoard side.
- In the left navigation menu, select Integrations center > Integrations.
- On the Integartions page, click the Add integration button (the one with the + sign).

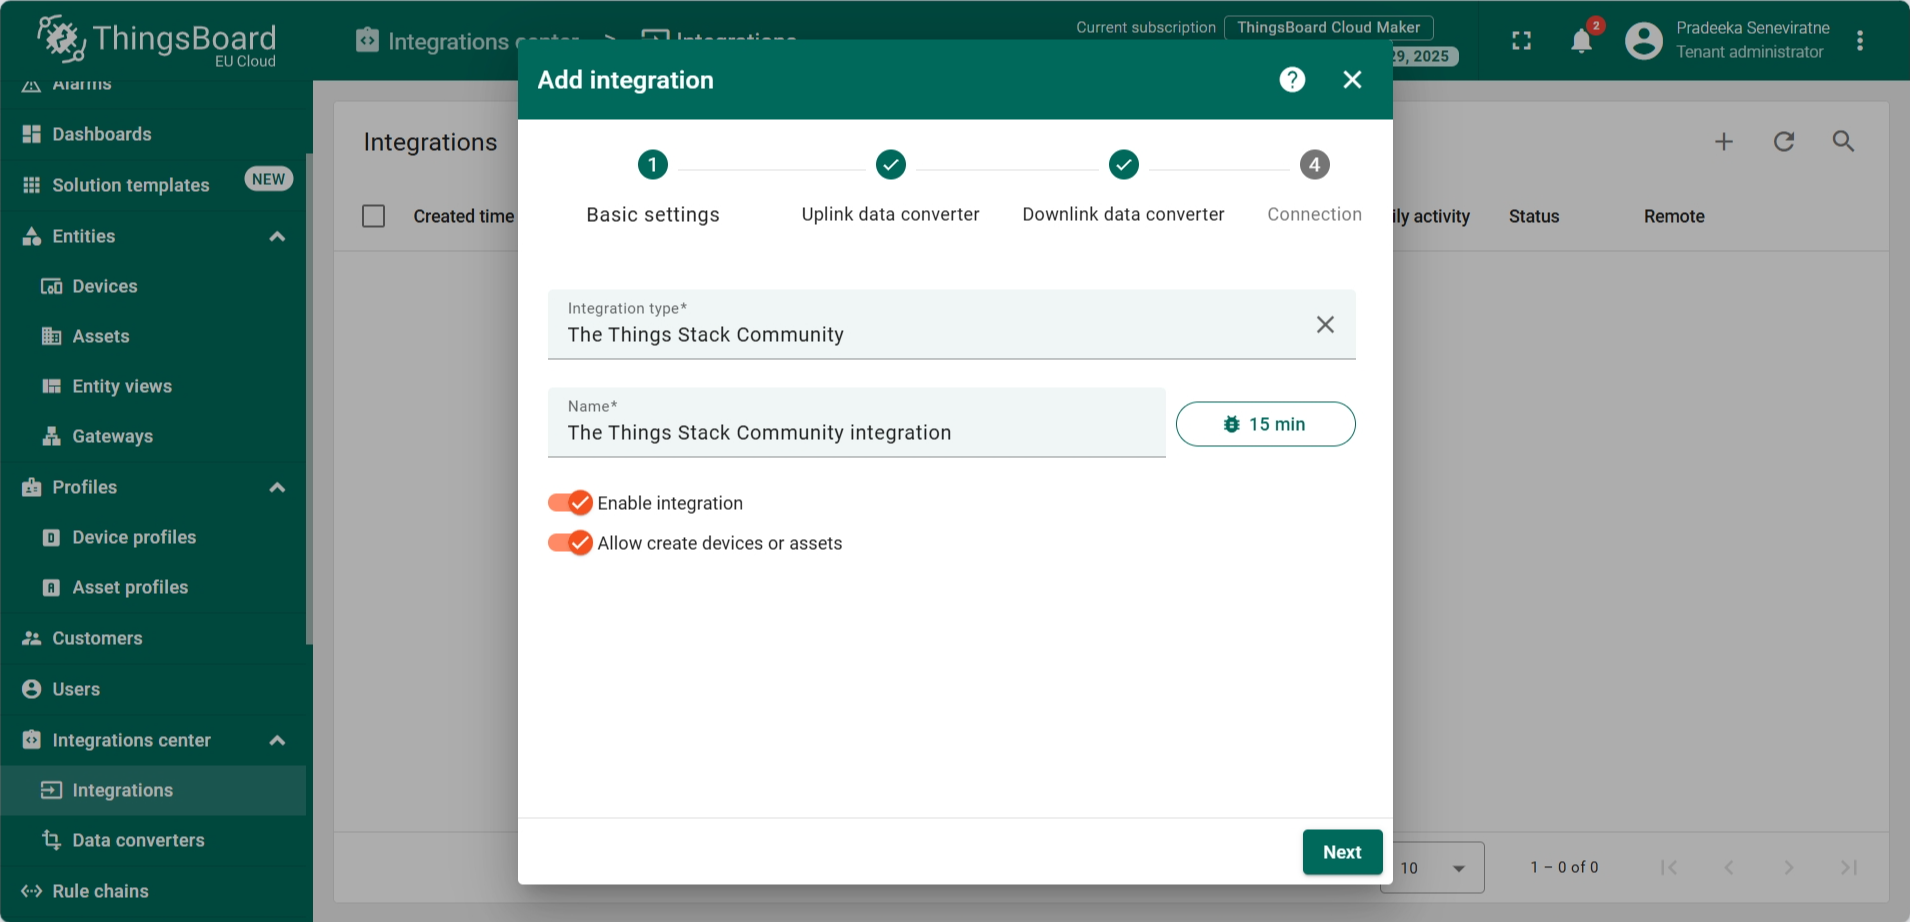
- The Add integration window appears.
- In the Basic settings tab, configure the following:
- Integration type: The Things Stack Community
- Name: The Things Stack Community integration (this will appear automatically)
- Turn on Enable integration
- Turn on Allow create devices or assets
- Click on the Next button.
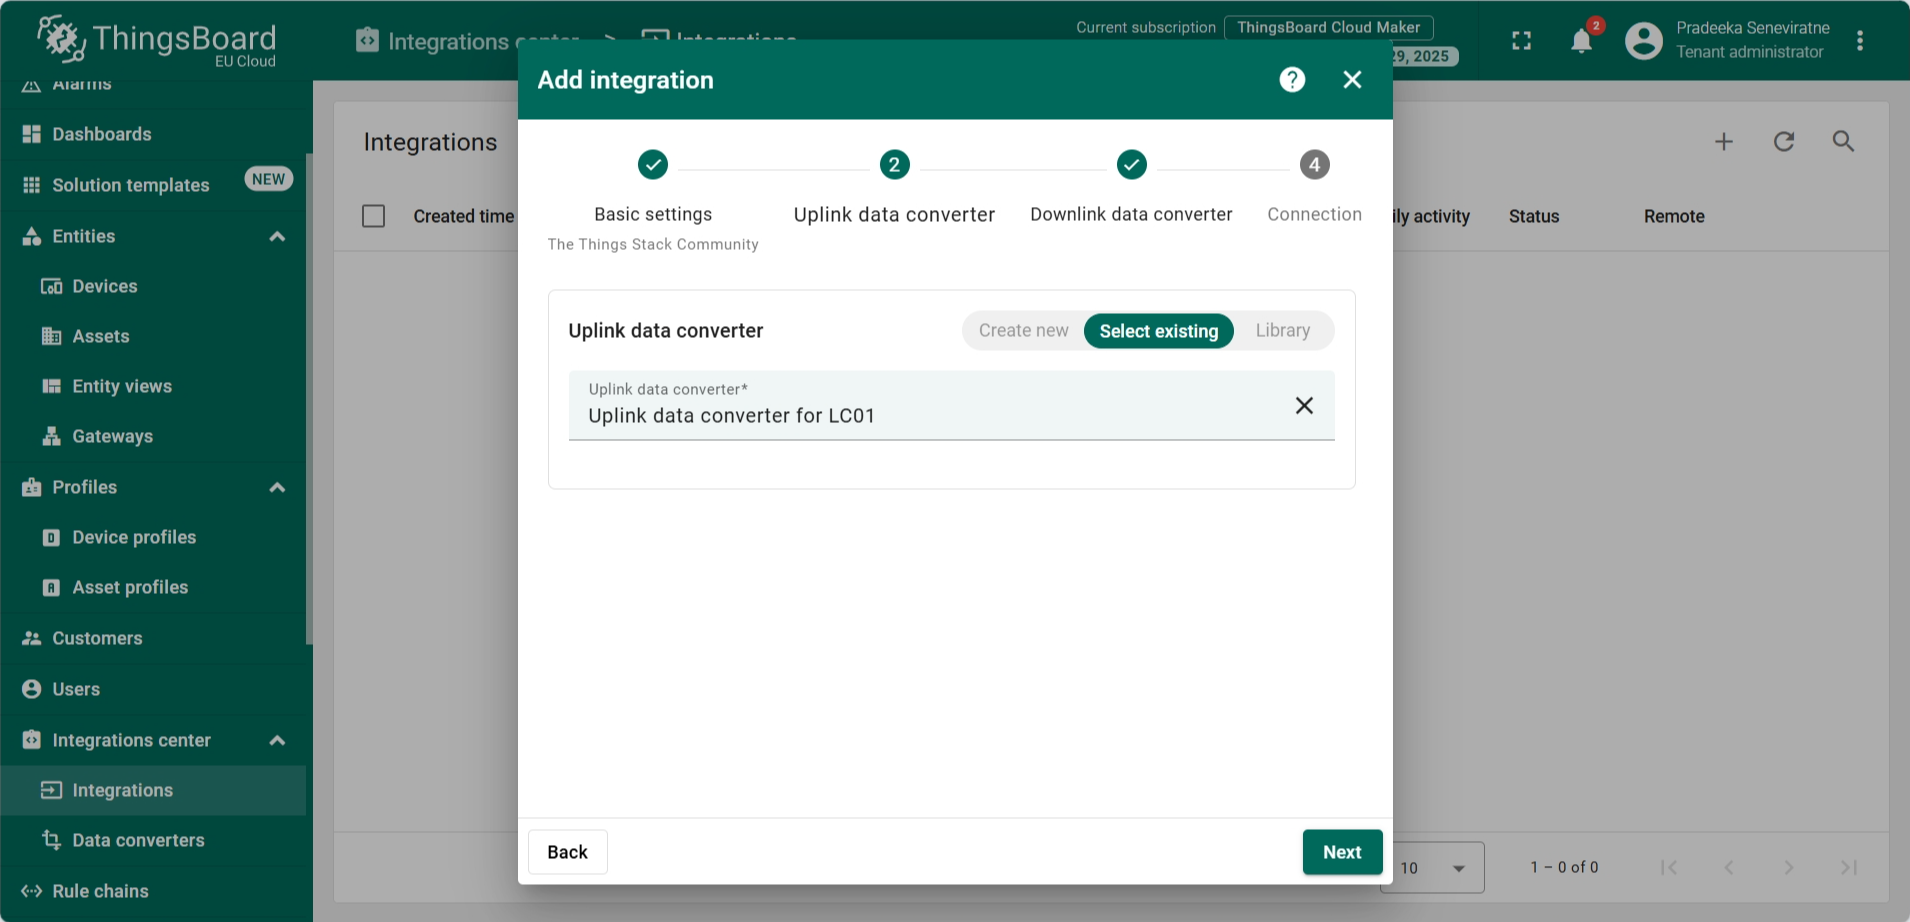
- In the Uplink data converter tab configure the follwoing.
- Select Select existing button.
- Uplink data converter: Select Uplink data converter for LC01 from the dropdown list.
- Click on the Next button.
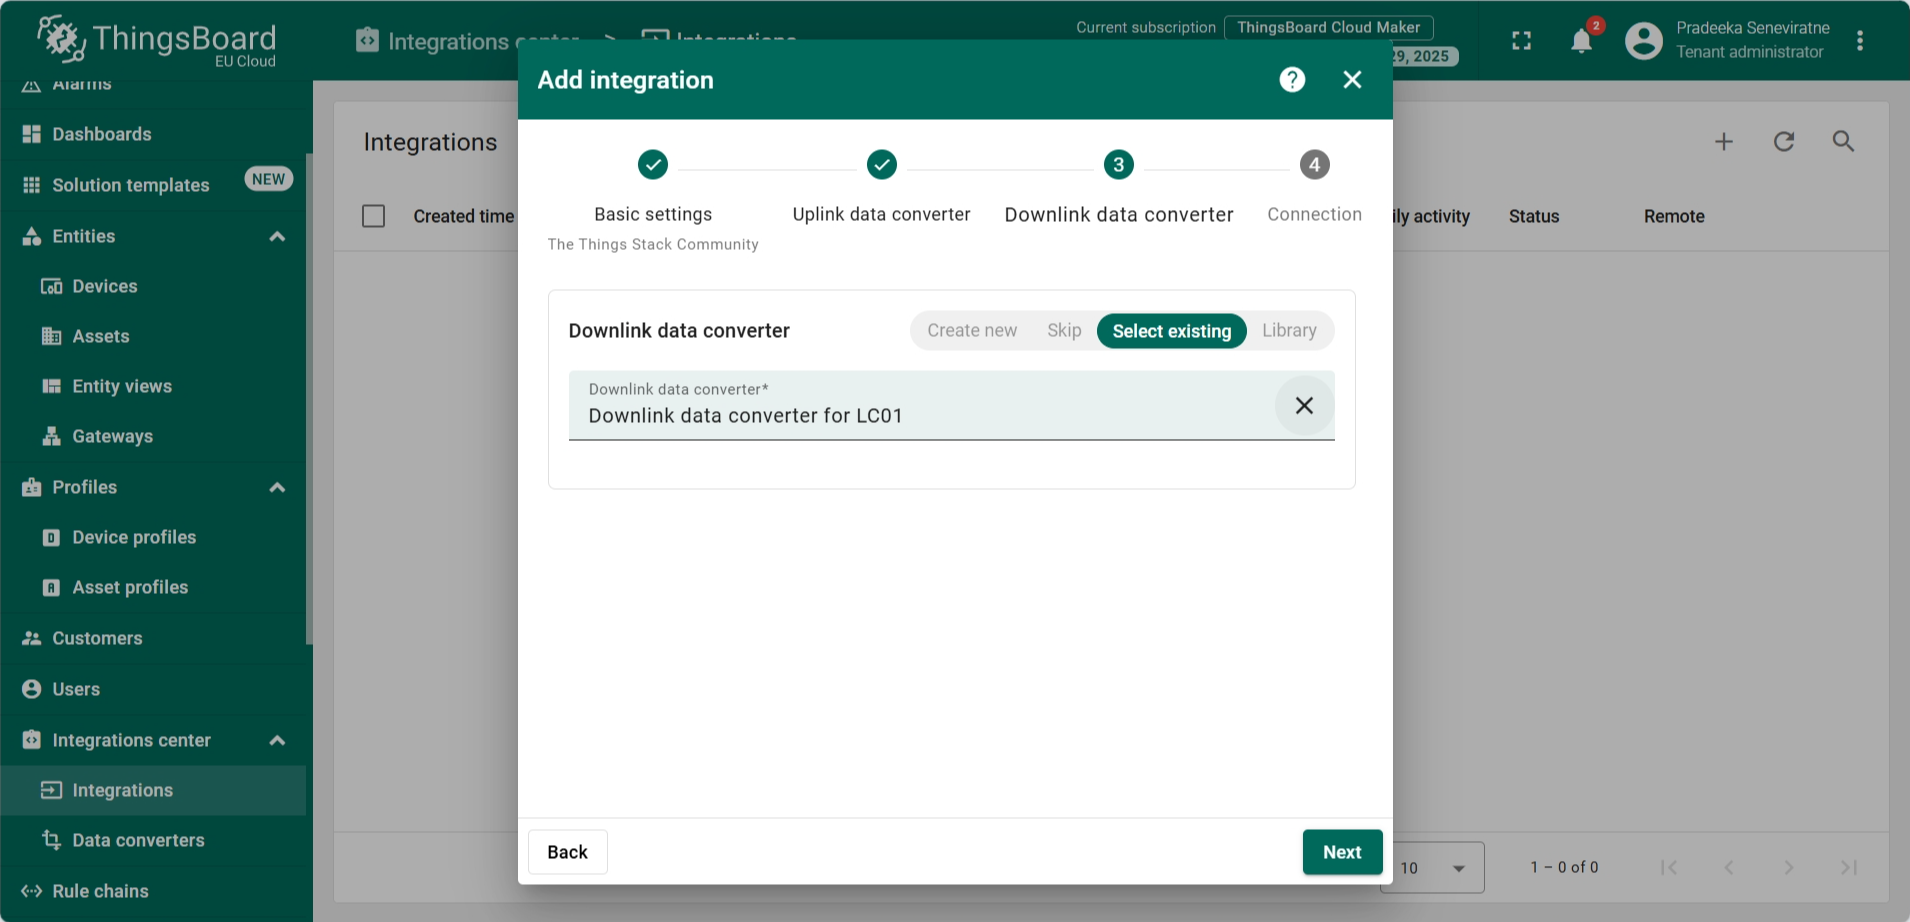
- In the Downlink data converter tab configure the follwoing.
- Select Select existing button.
- Downlink data converter: Select Downlink data converter for LC01 from the dropdown list.
- Click on the Next button.
- In the Connection tab configure the follwing.
- Host type: Region
- Region: eu1 (because we use The Things Stack eu1 cluster)
- Port: 8883
- Username: The username you copied from The Things Stack's MQTT configurations page.
- Password: The API key you copied from The Things Stack's MQTT configurations page.
- Enable SSL: On
- Use API v3: On
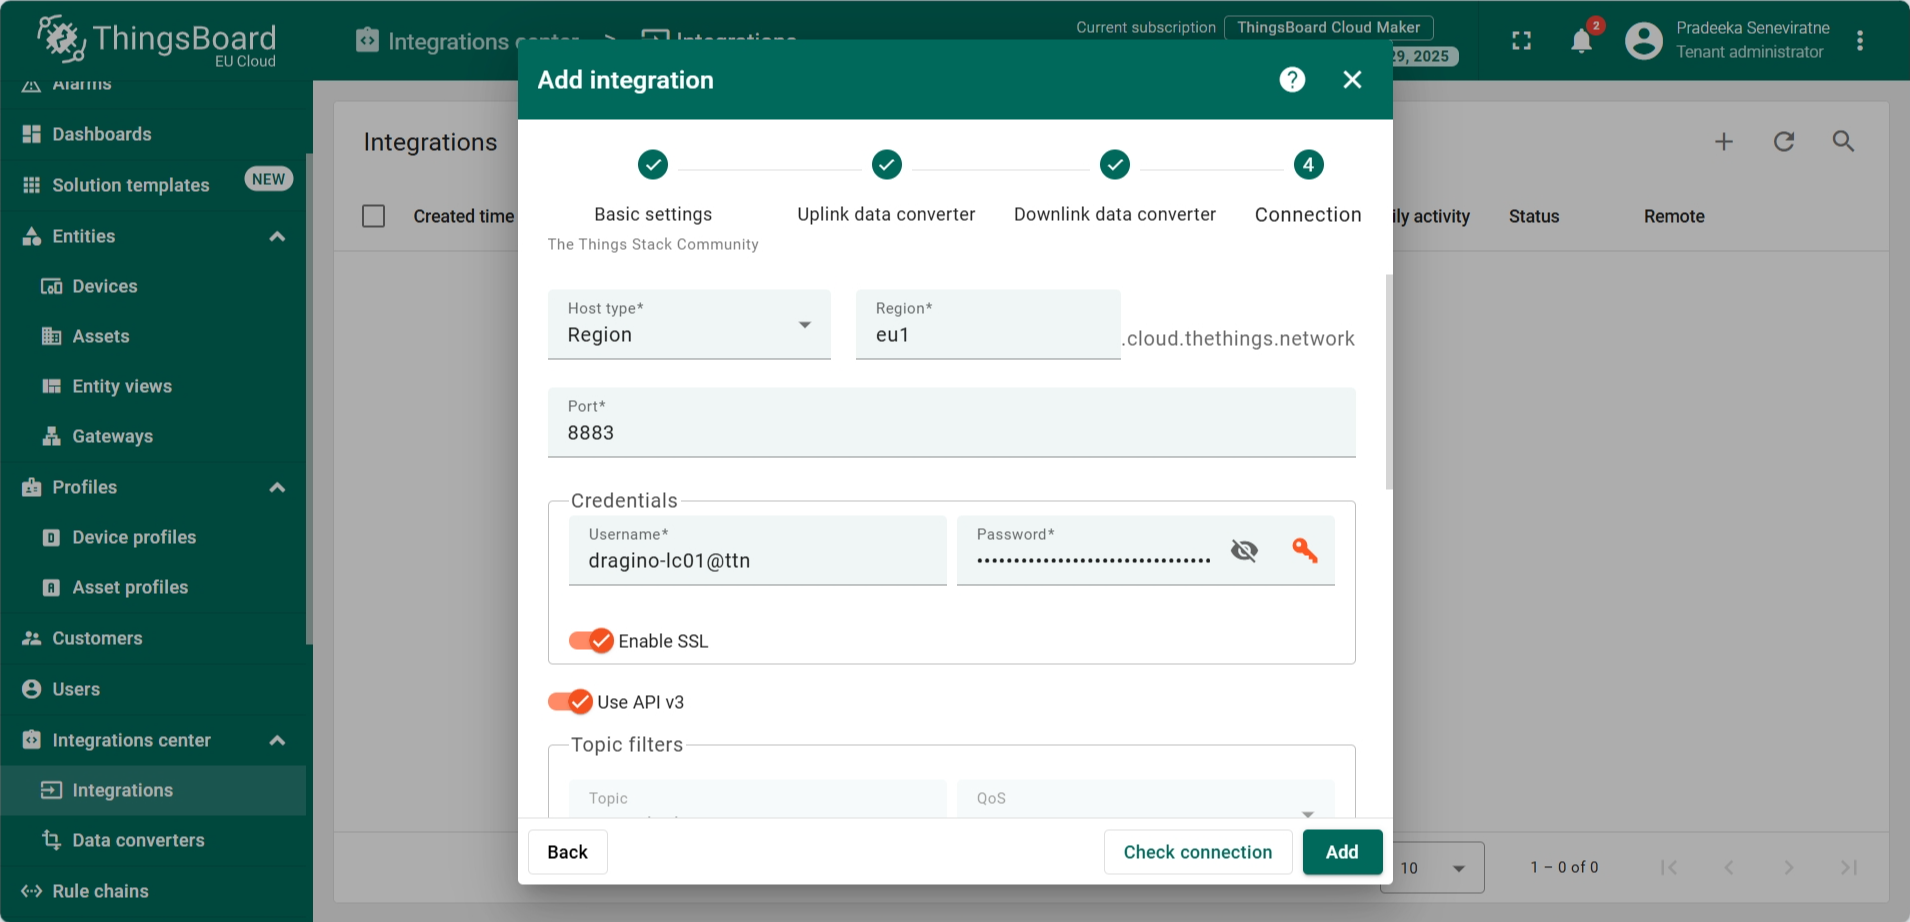
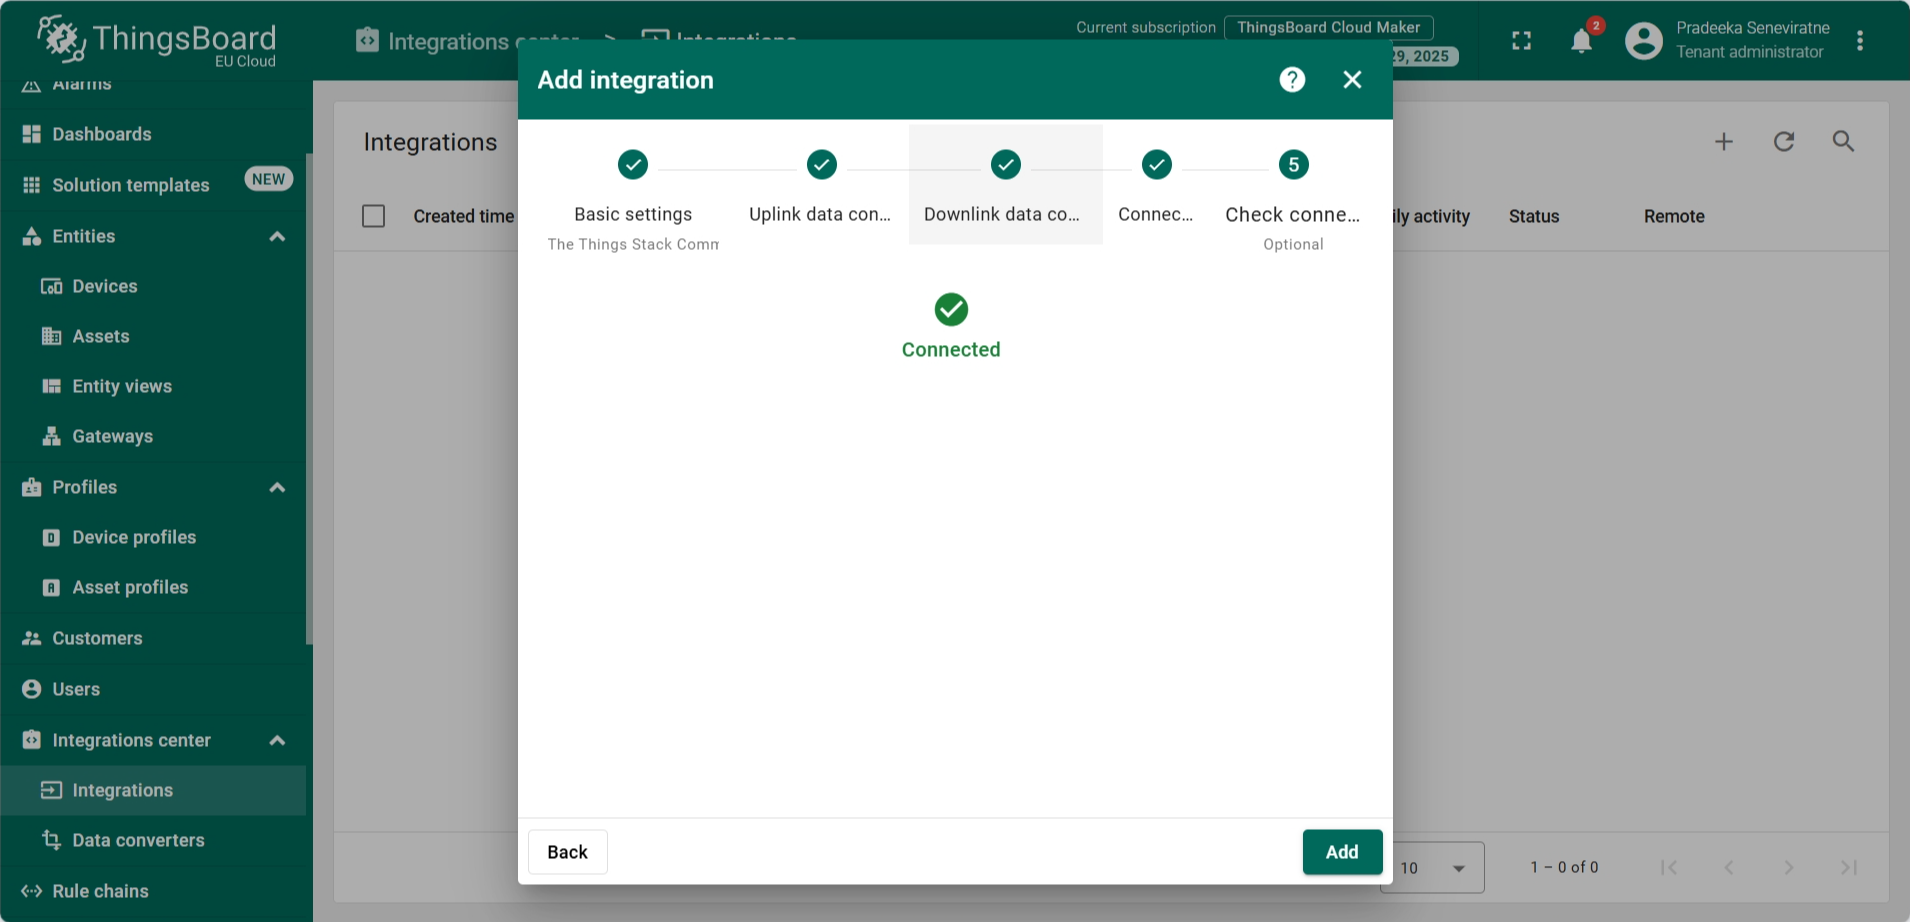
- Click the Check connection button to test the connection. If everything is configured correctly, you will see the Connected message.
- Finally, click on the Add button.
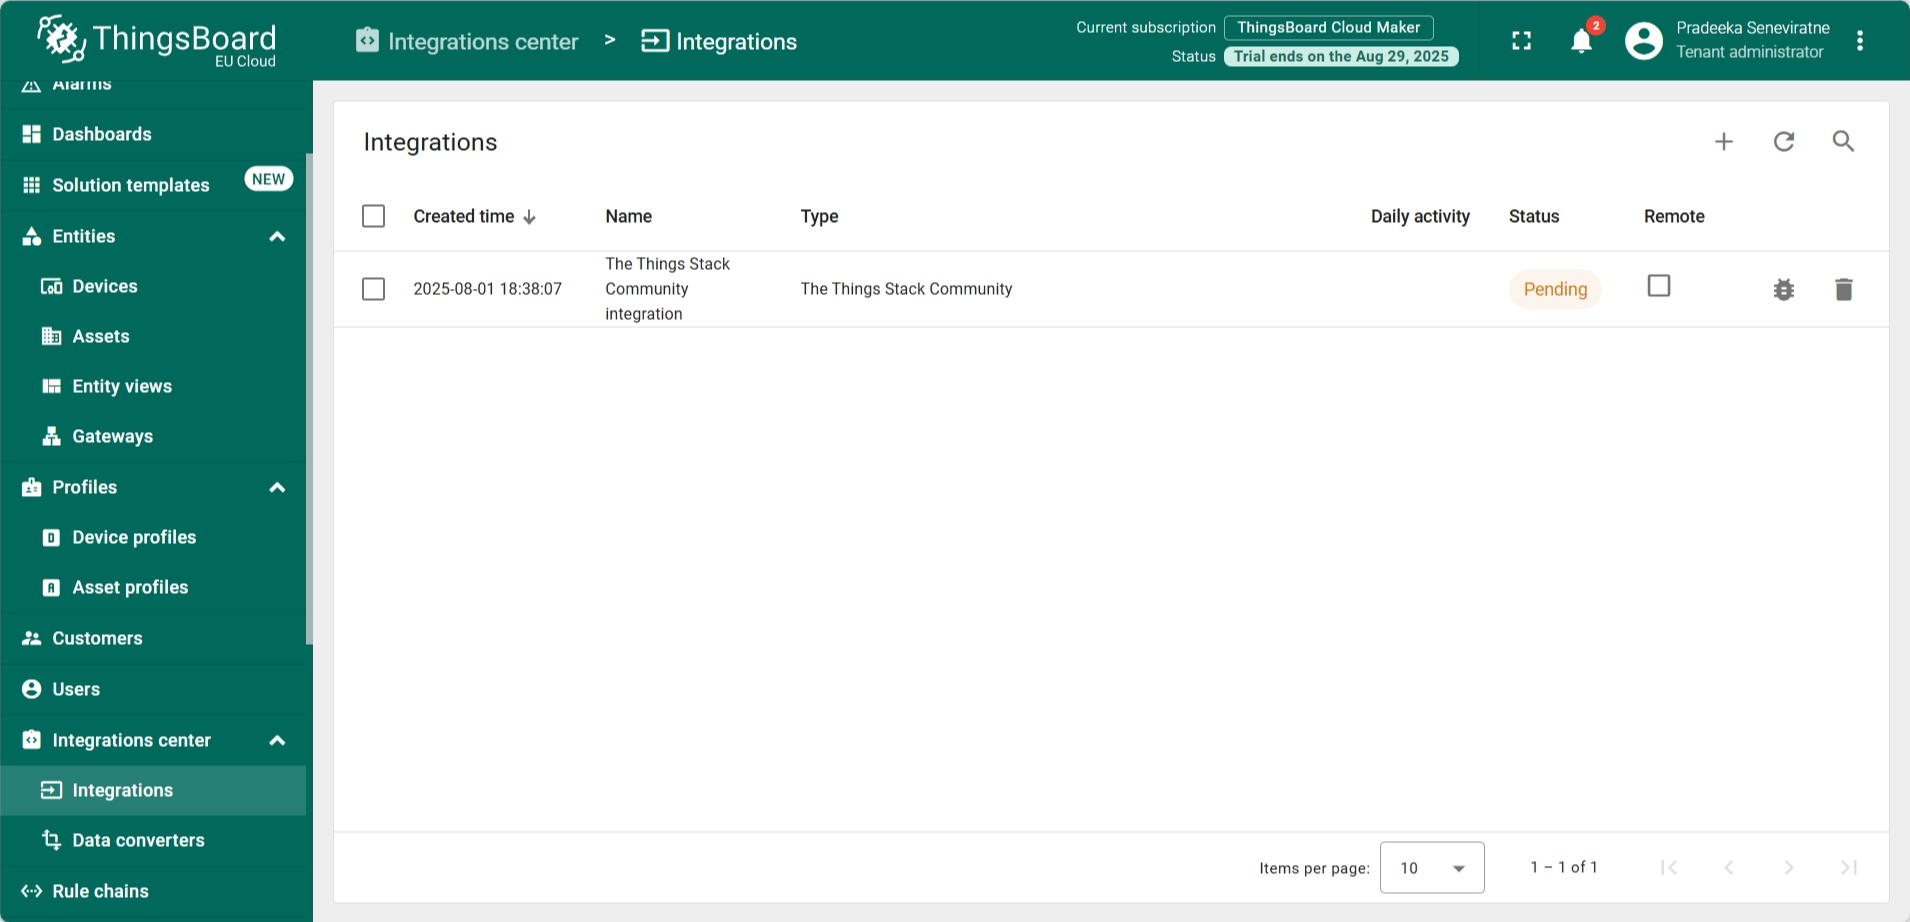
- The new integration has now been added to the Integrations list. Its status is shown as Pending.
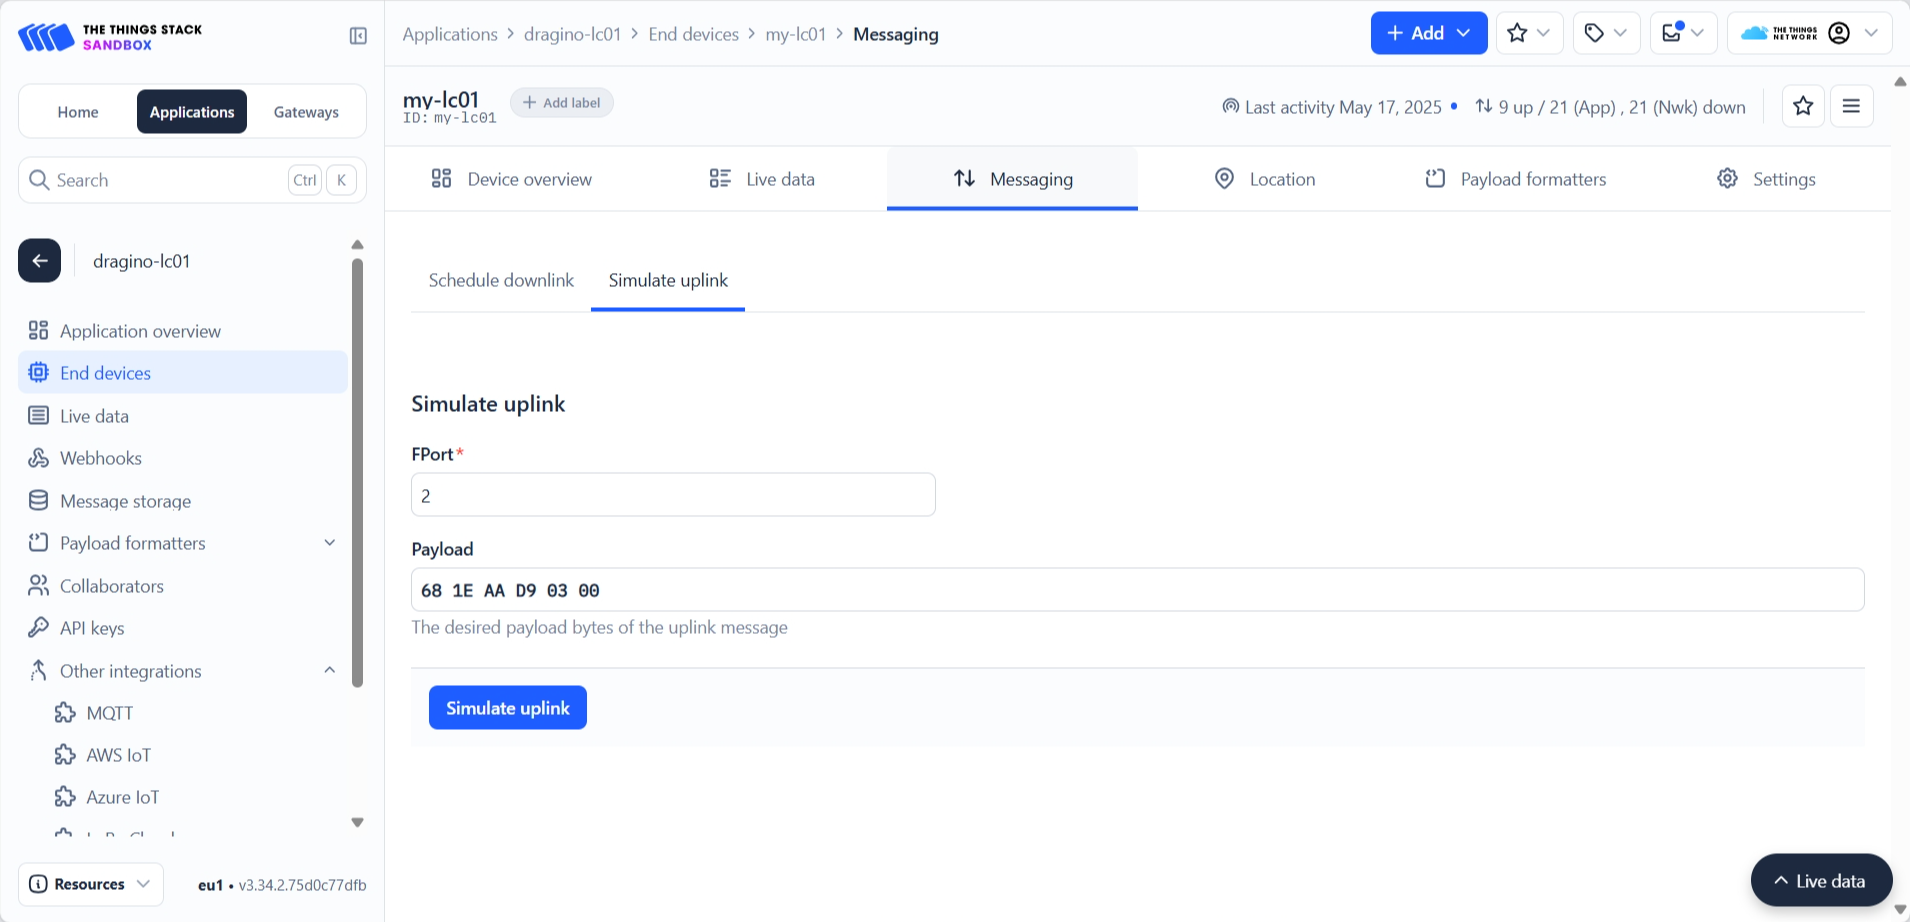
Sending simulated uplink from The Things Stack
To automatically create a device for the LC01 in ThingsBoard, we will now send a simulated uplink from The Things Stack. When ThingsBoard receives the first uplink from The Things Stack, it will automatically create a device in the Devices section.
- In The Things Stack, within your application, select End devices from the left navigation. Then, from the list of end devices, select LC01.
- In your end device page, select Messaging tab, and then select Simulate uplink tab. Enter the following:
- FPort: 2
- Payload: 681EAAD90300
- Click on the Simulate uplink button.
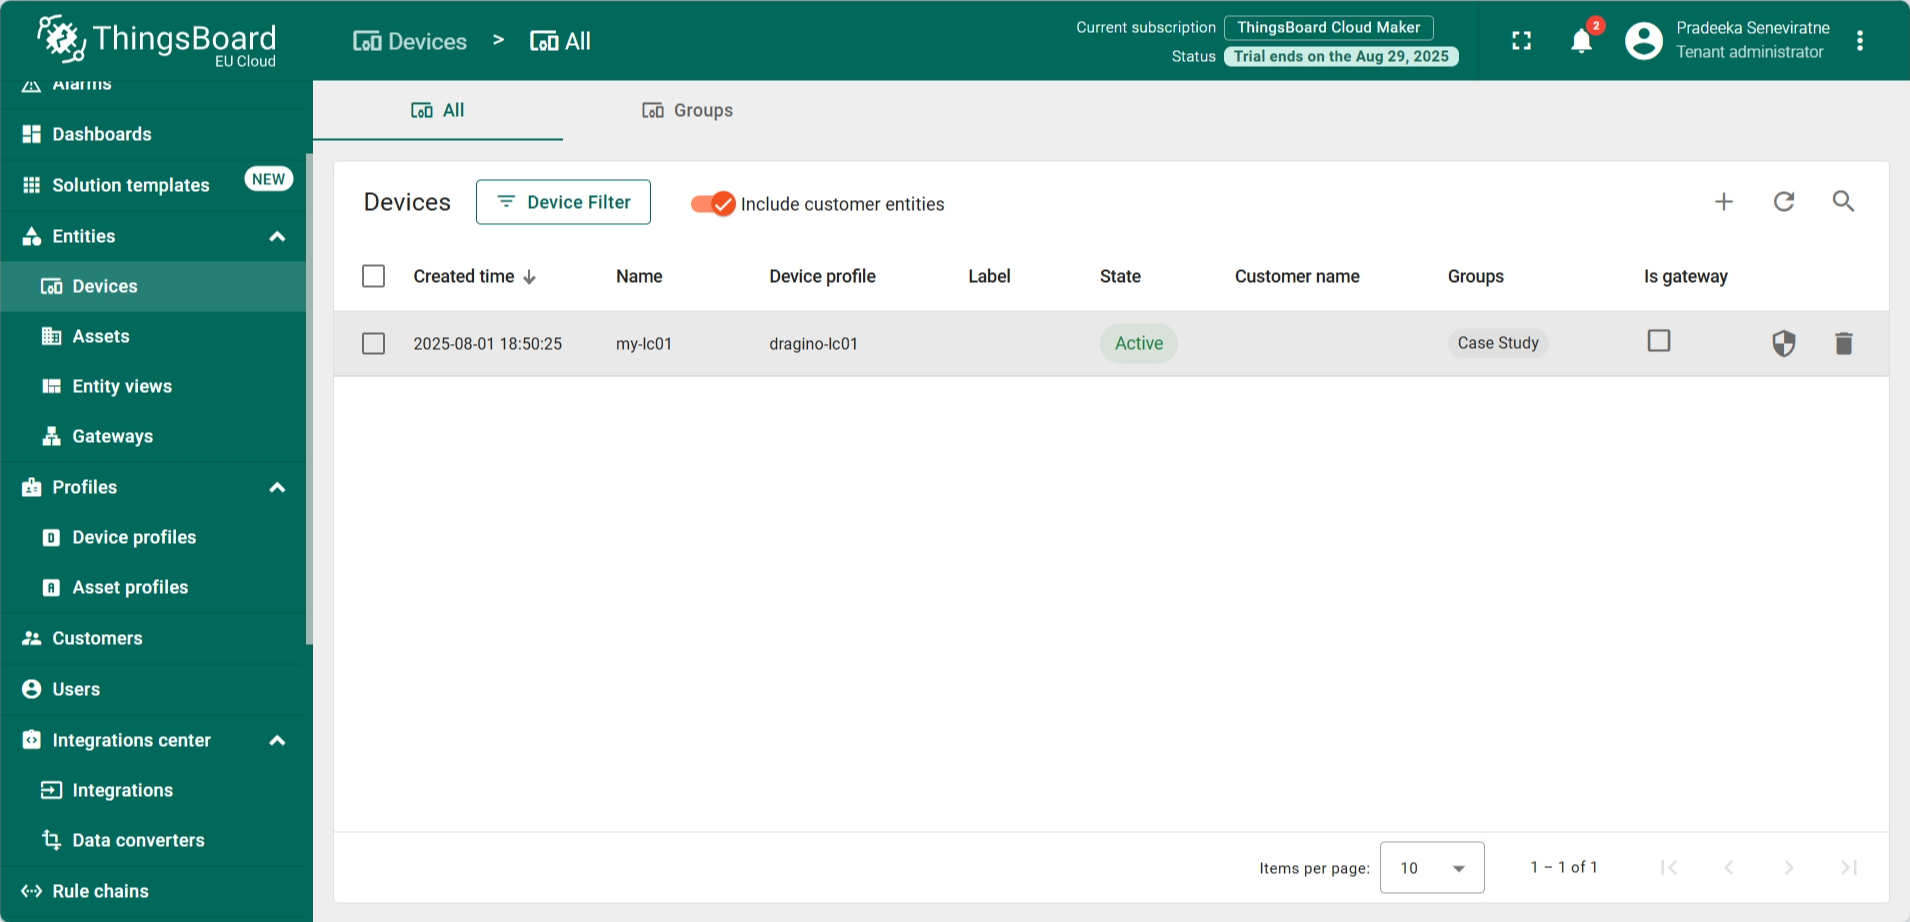
- In the ThingsBoard, from the left navigation, select Entities > Devices.
- You can now see that a new device for LC01 has been created on the Devices page, and its status is Active.
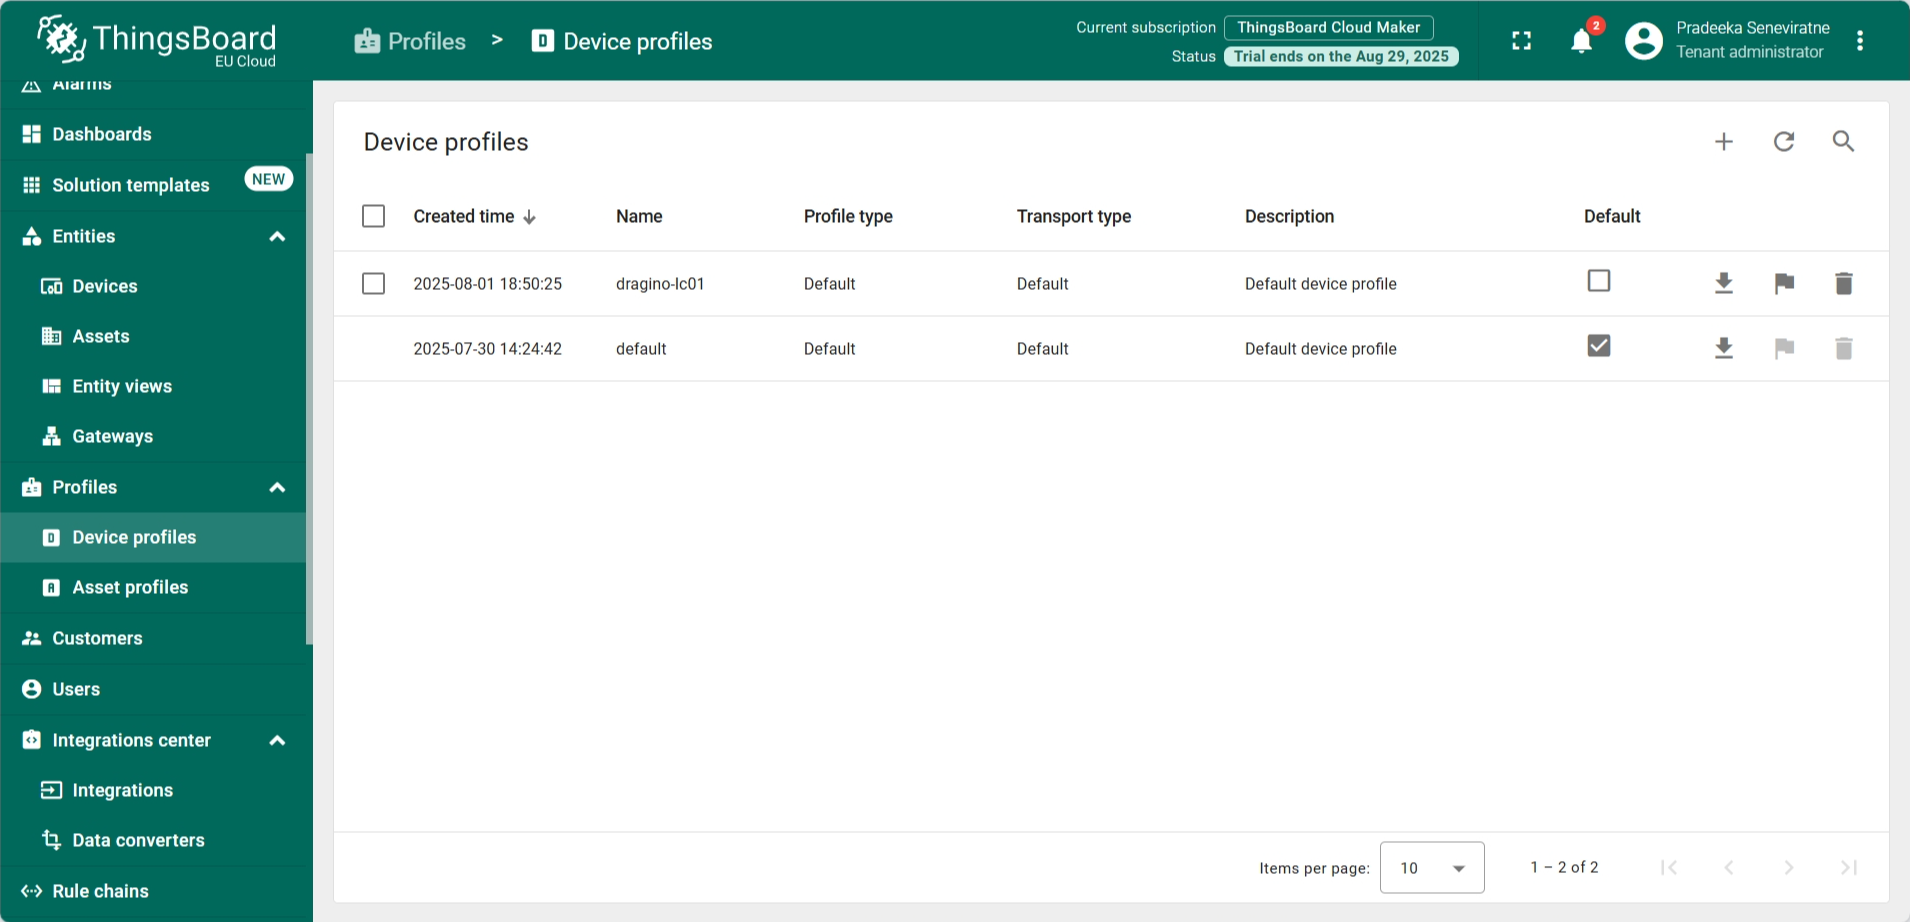
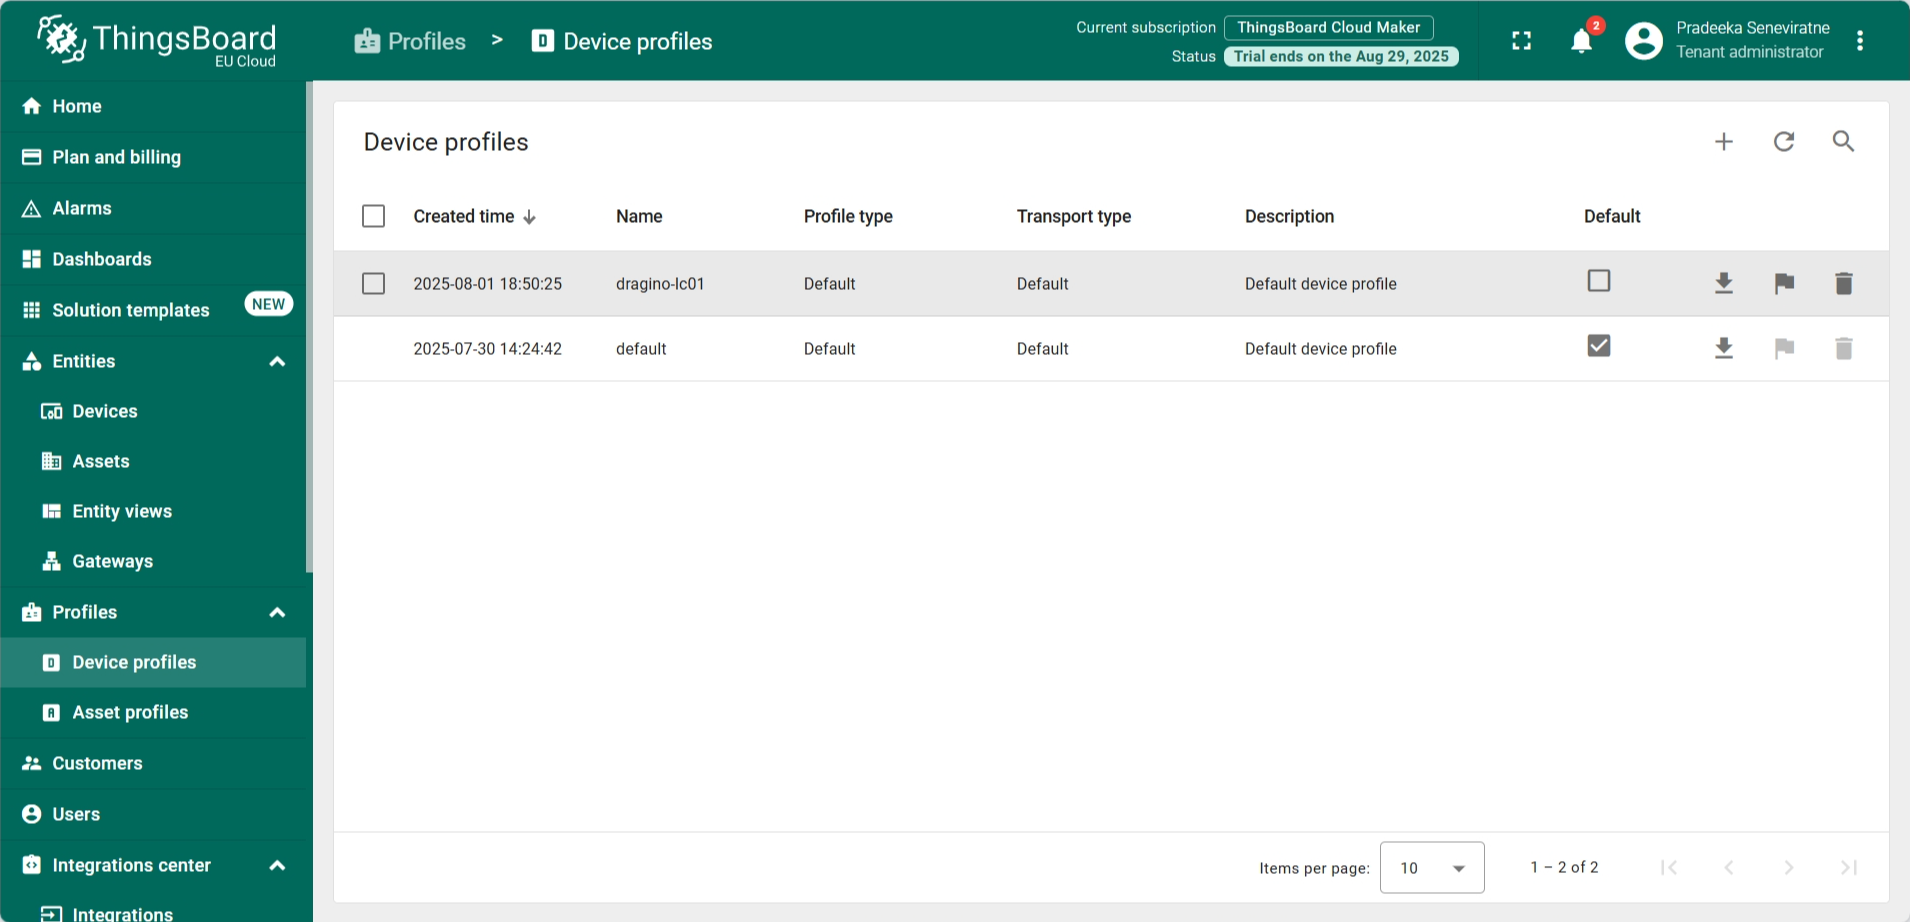
- In the ThingsBoard, from the left navigation, select Profiles > Device profiles. You can now see that a new device profile for LC01 has been created on the Device profiles page
Creating a Rule Chain
ThingsBoard Rule Chains are visual workflows that define how incoming data from devices is processed within the platform. They allow you to trigger actions, apply filters, transform data, generate alarms, or forward messages based on predefined conditions. Rule Chains are highly flexible and can be built using a drag-and-drop interface, making it easy to create complex logic without writing code. They are essential for implementing automation, alerts, and integrations in your IoT solution.
For this tutorial, we have already created a rule chain, so you only need to import it and make a few configurations.
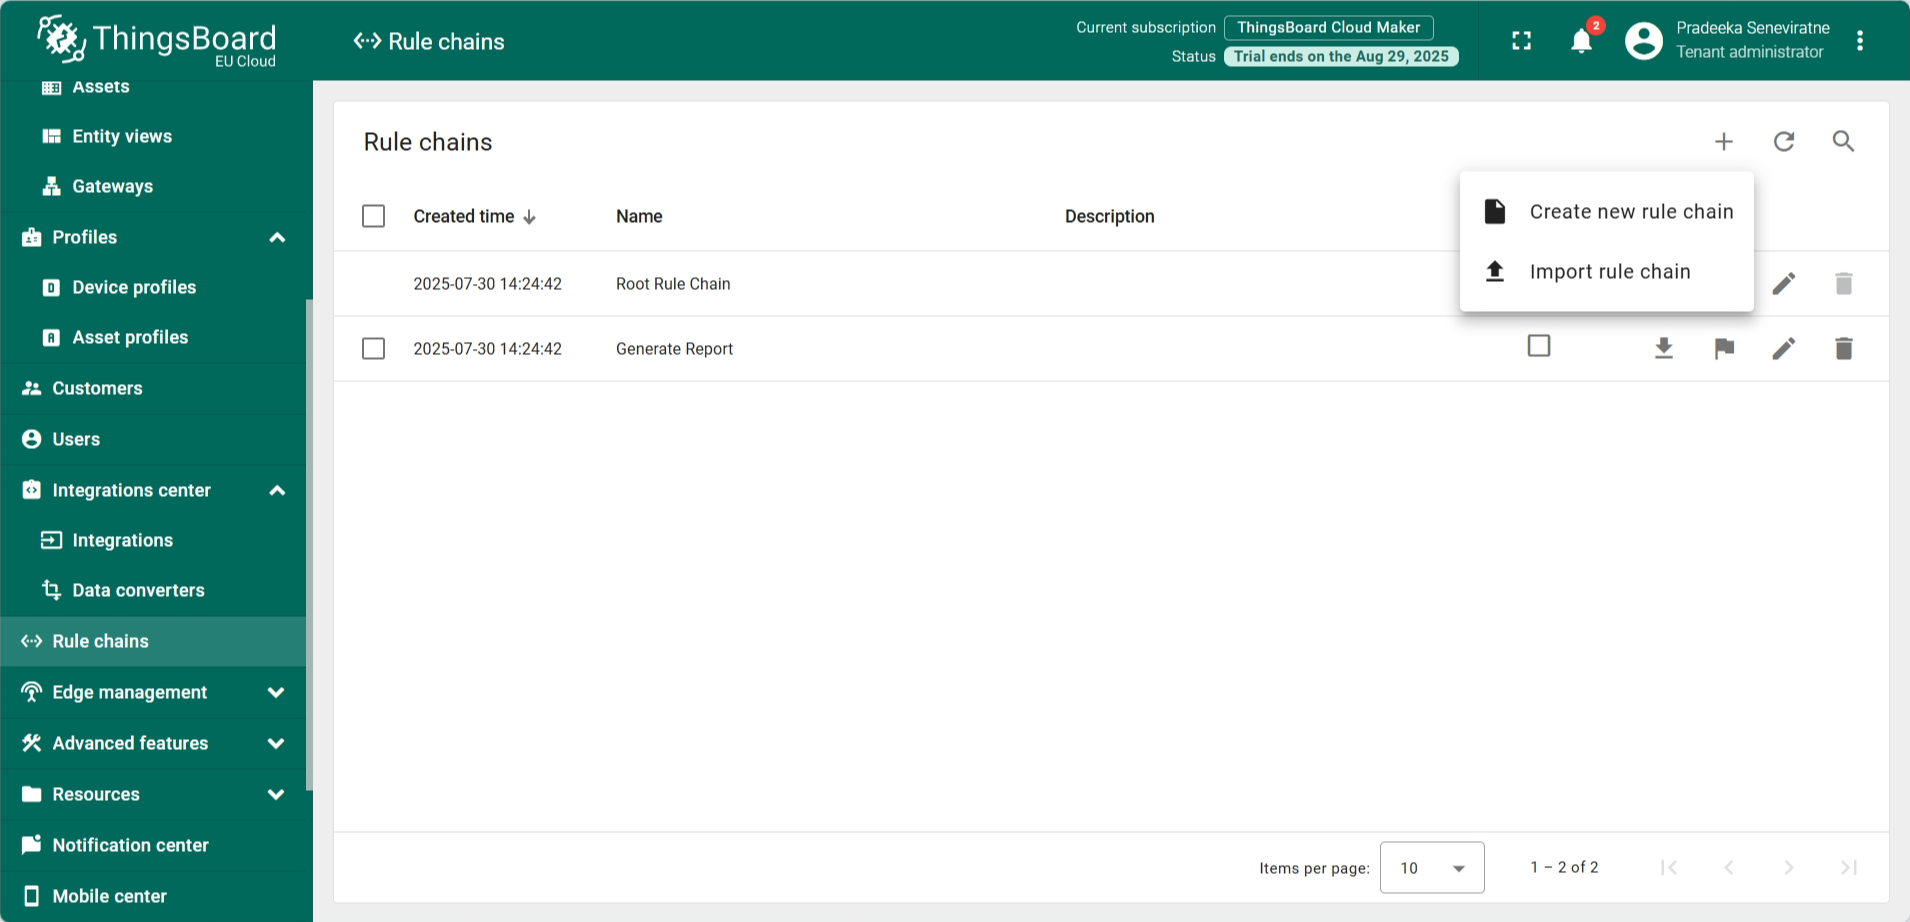
- In the left navigation menu, select Rule chains.
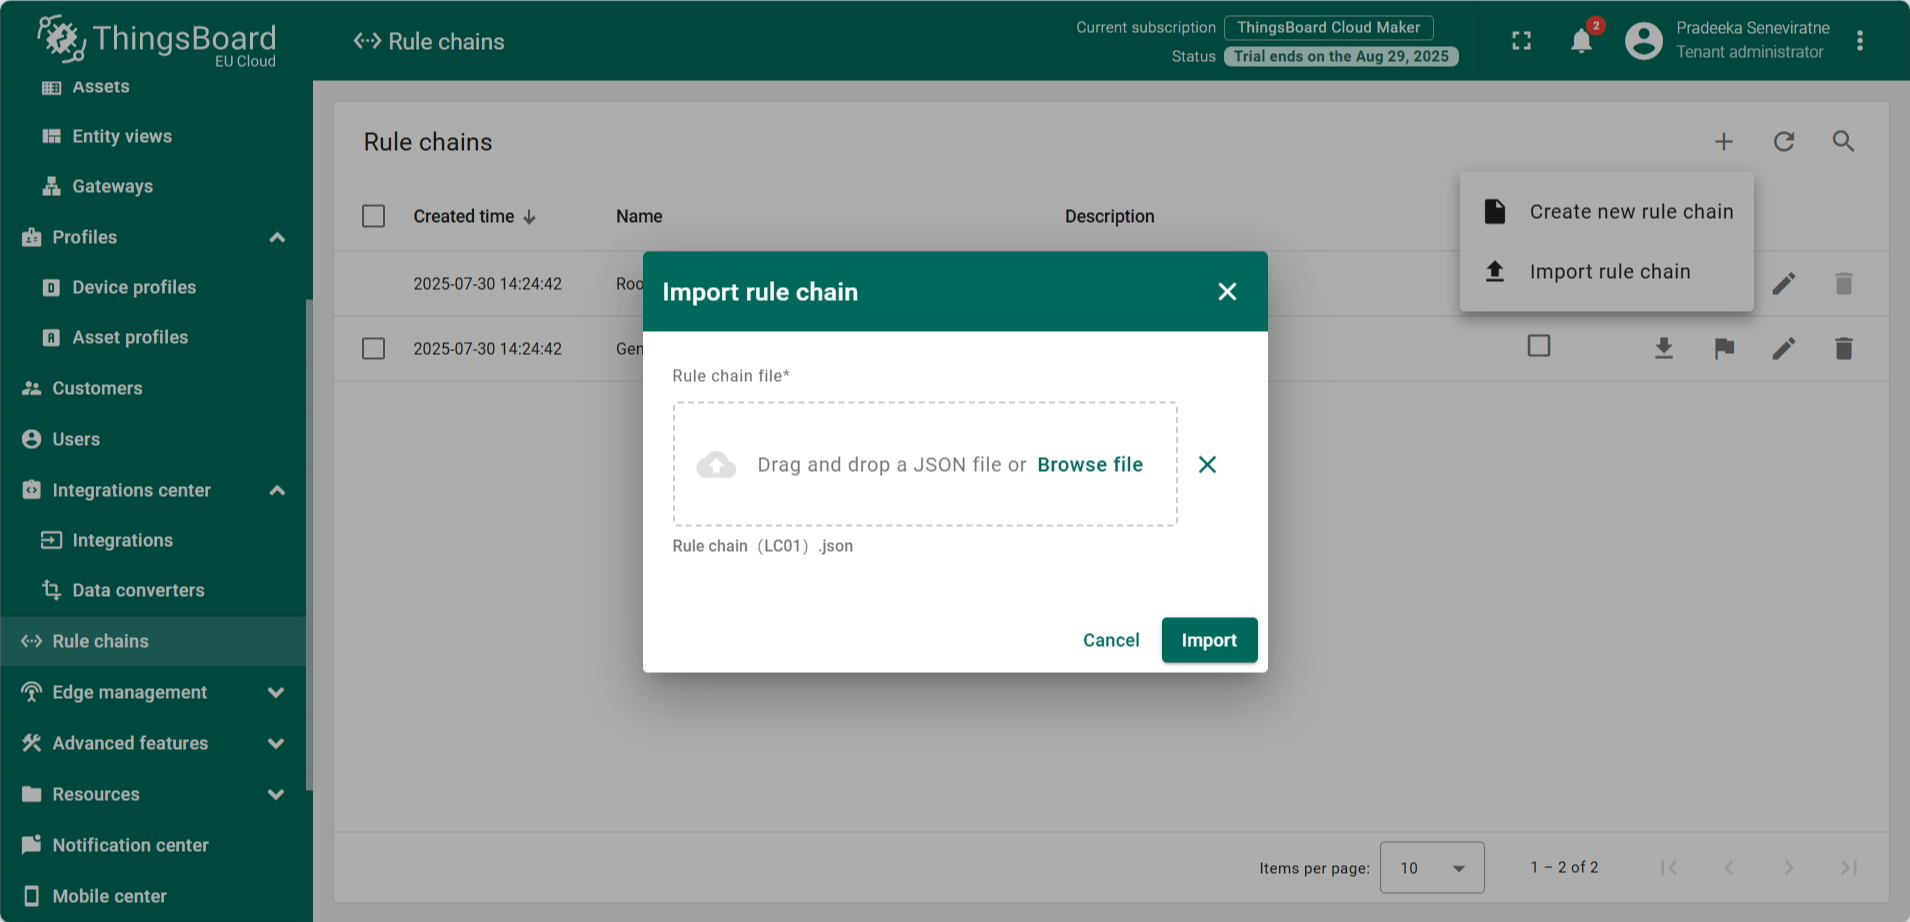
- On the Rule chains page, click the Add rule chain button (the one with the + sign). From the dropdown menu, select Import rule chain.
You can download the JSON file for LC01 rule chain here.
- Browse and locate the downloaded rule chain by selecting the Browse file.
- Click on the Import button.
- The rule chain will open in the design view in edit mode.
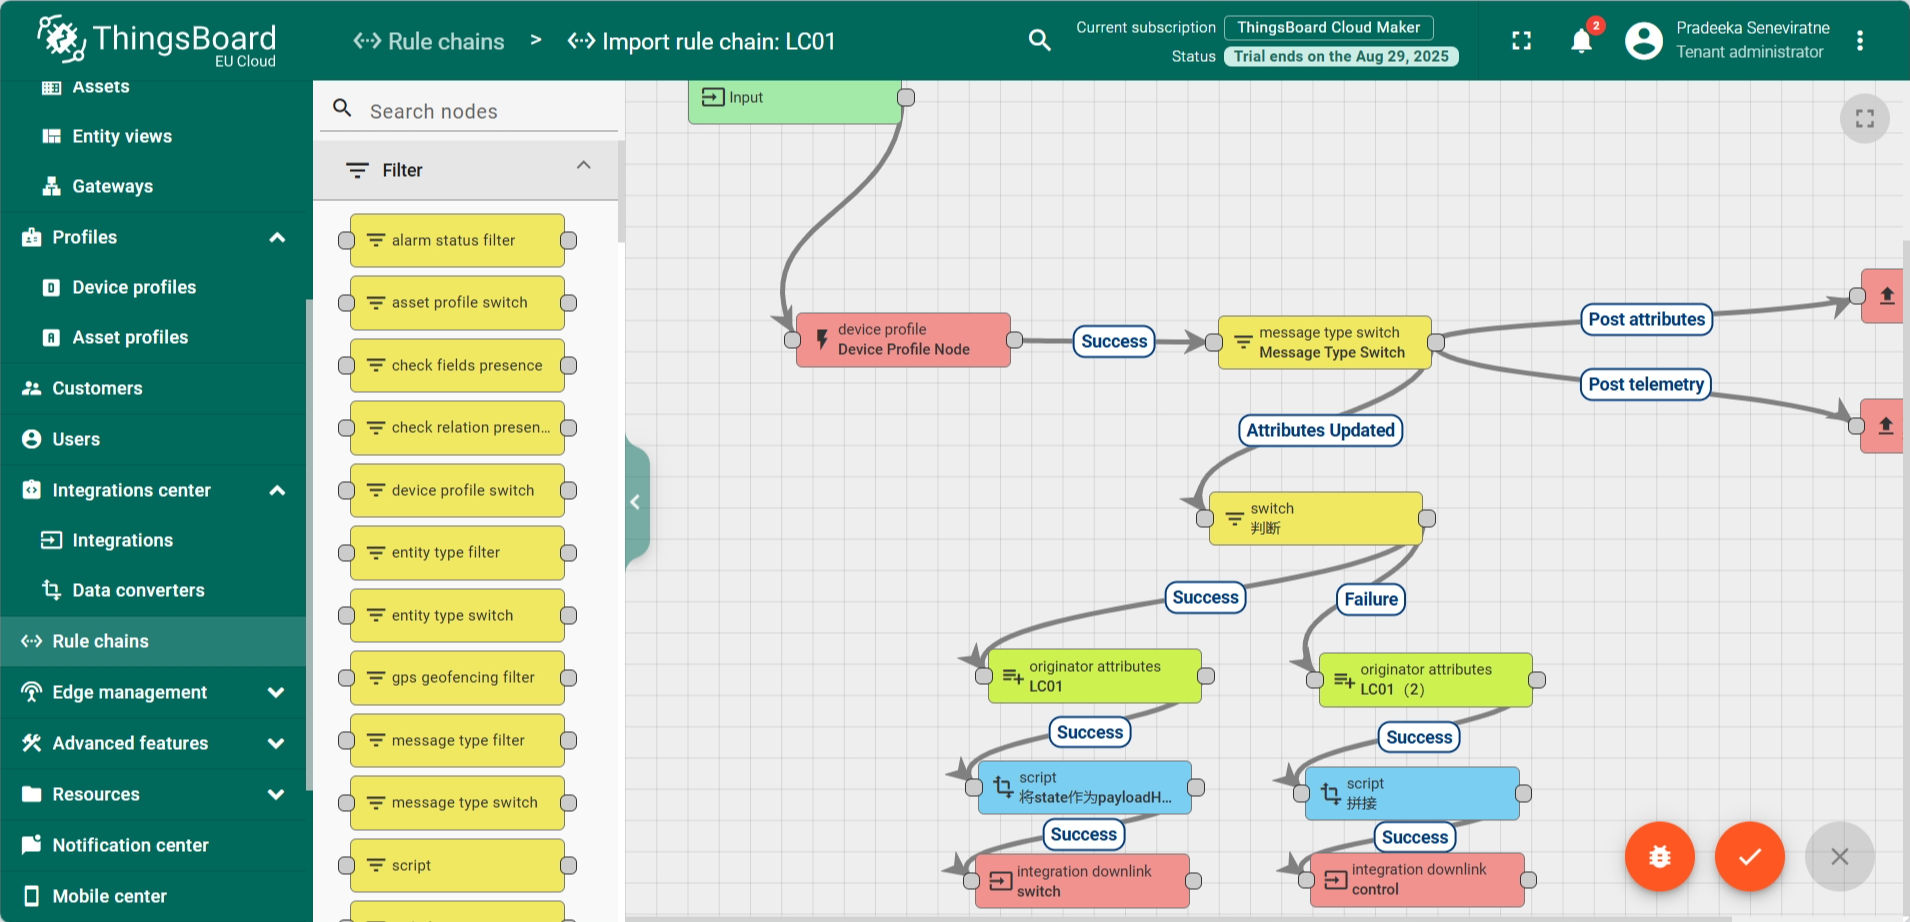
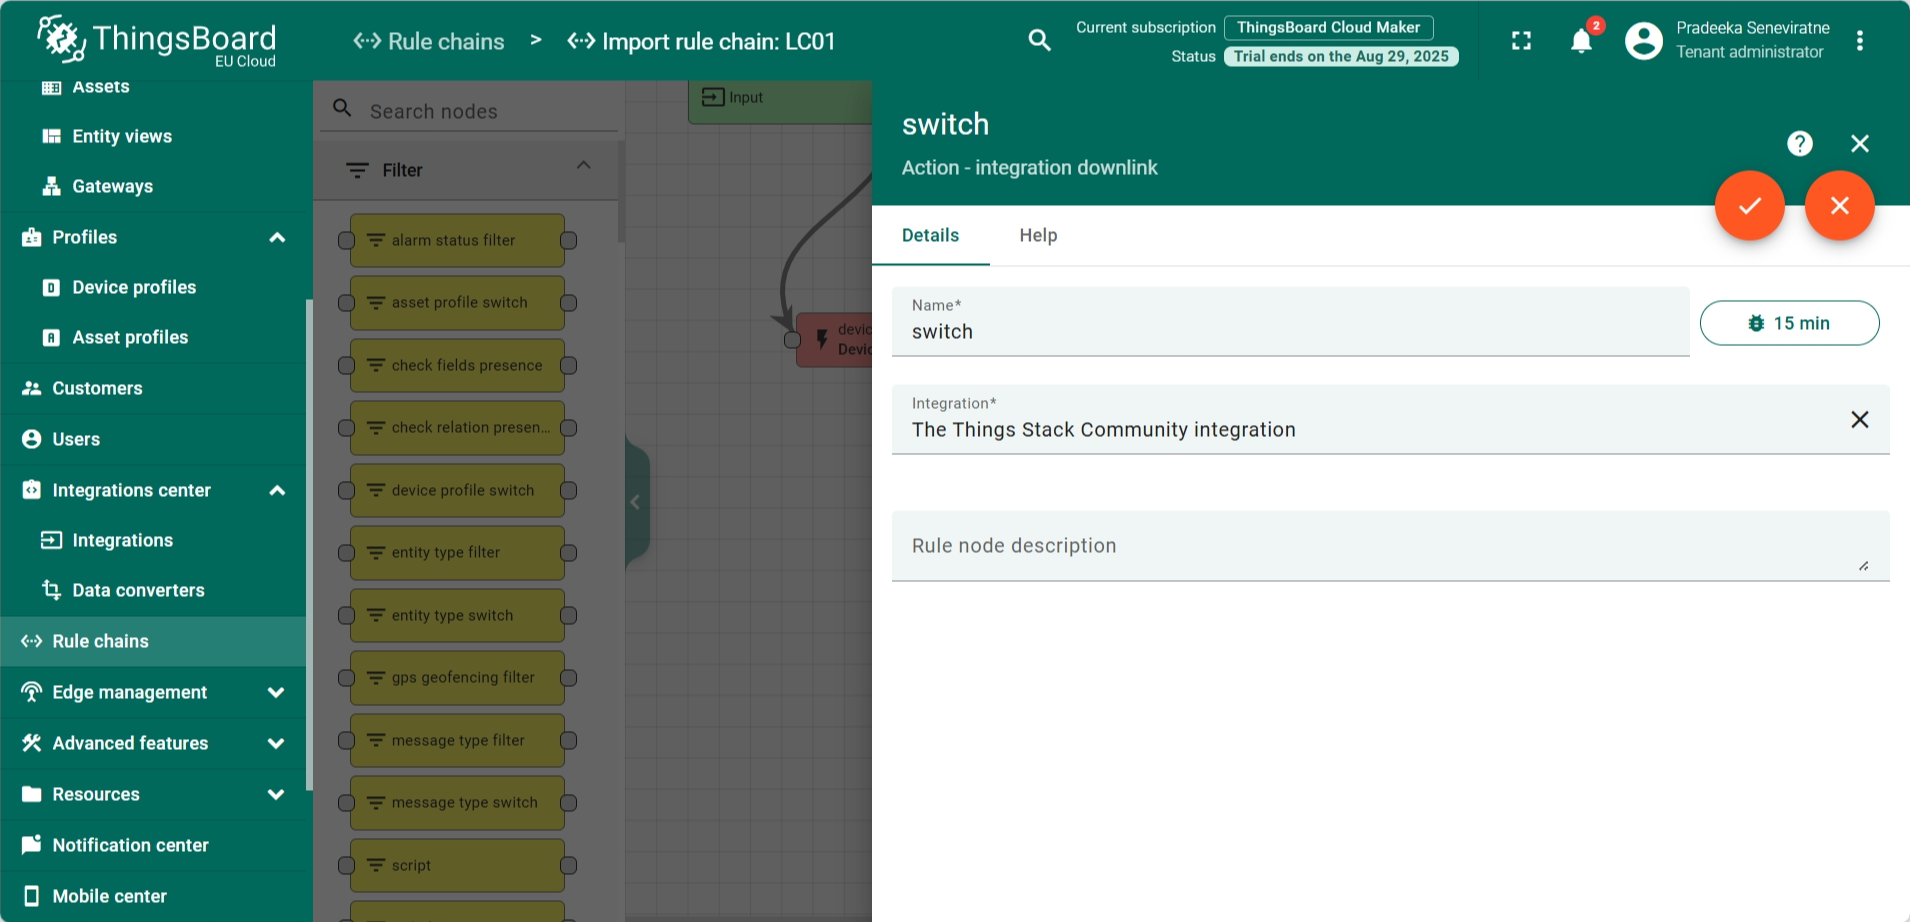
- Find the node Integration downlink - switch node and double click on it. A configuration window appears.
- Integration: Select The Things Stack Community integration from the list.
- Once you have done, click on the Apply changes button, and then close configuration the window.
- Find the node Integration downlink - control node and double click on it. A configuration window appears.
- Integration: Select The Things Stack Community integration from the list.
- Once you have done, click on the Apply changes button, and then close configuration the window.

- Finally, click on the Apply changes button in the rule chain editor.
Linking with Device Profile
Now you have to link the rule chain with the device profile.
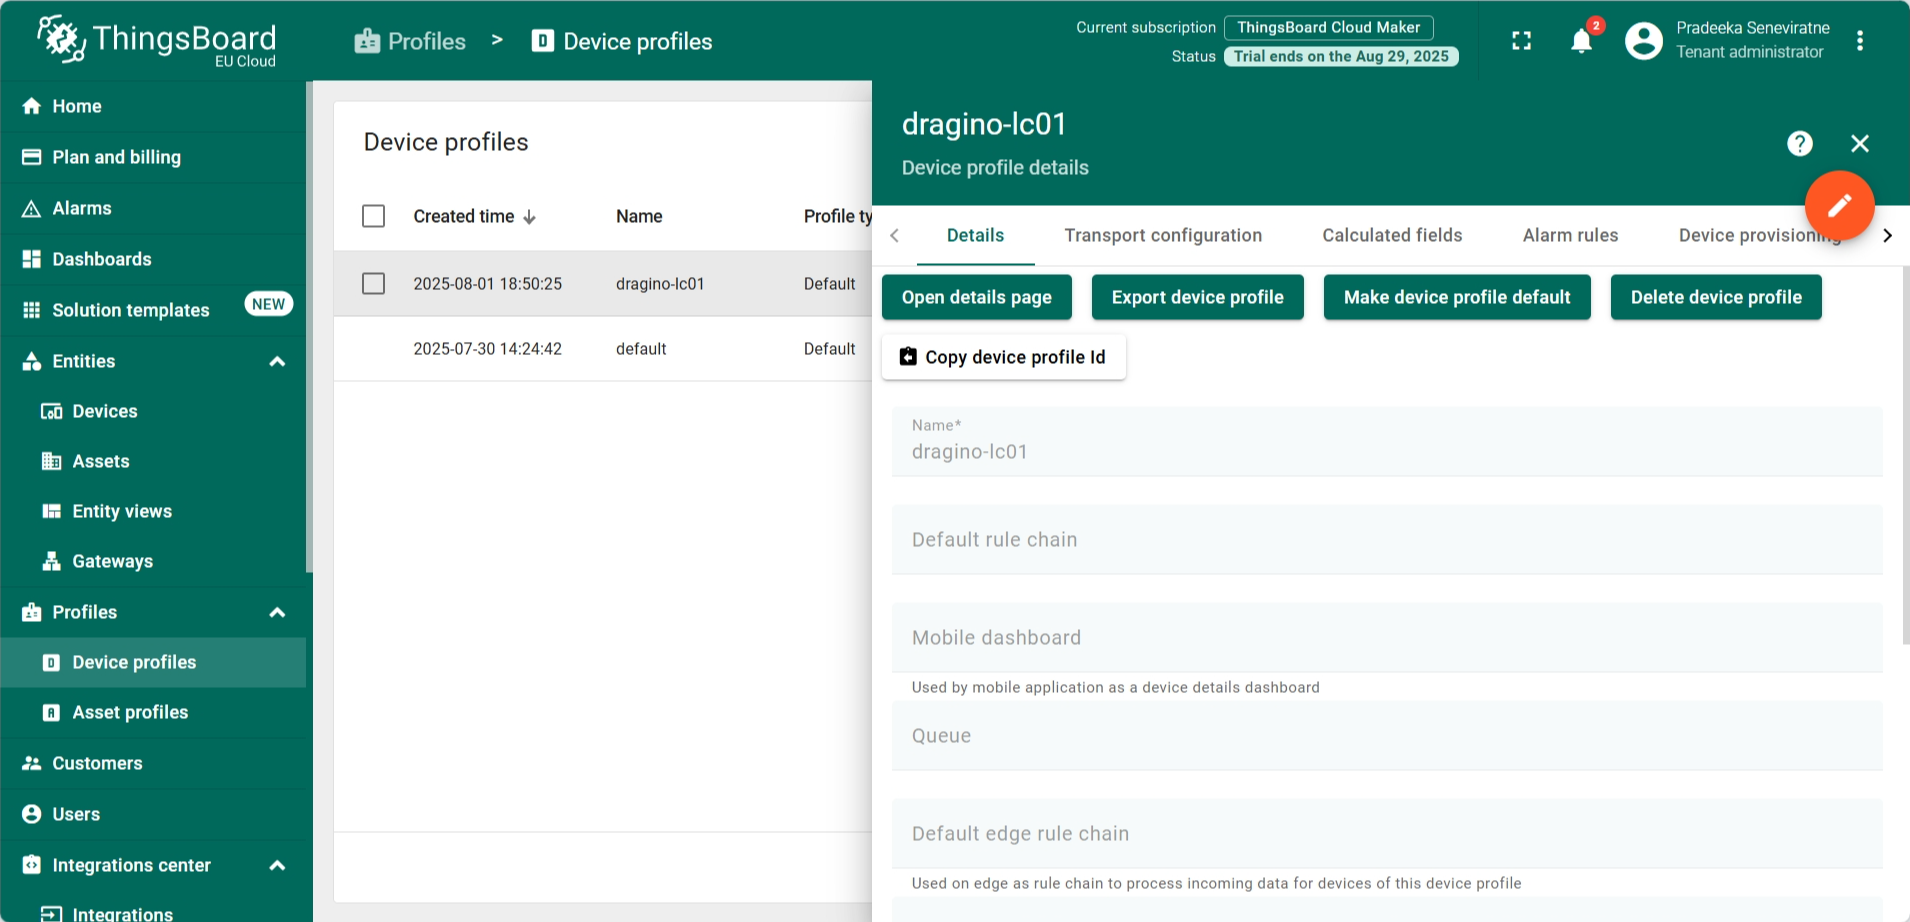
- In the ThingsBoard, from the left navigation, select Profiles > Device profiles.
- Click on the dragino-lc01 from the device profiles list.
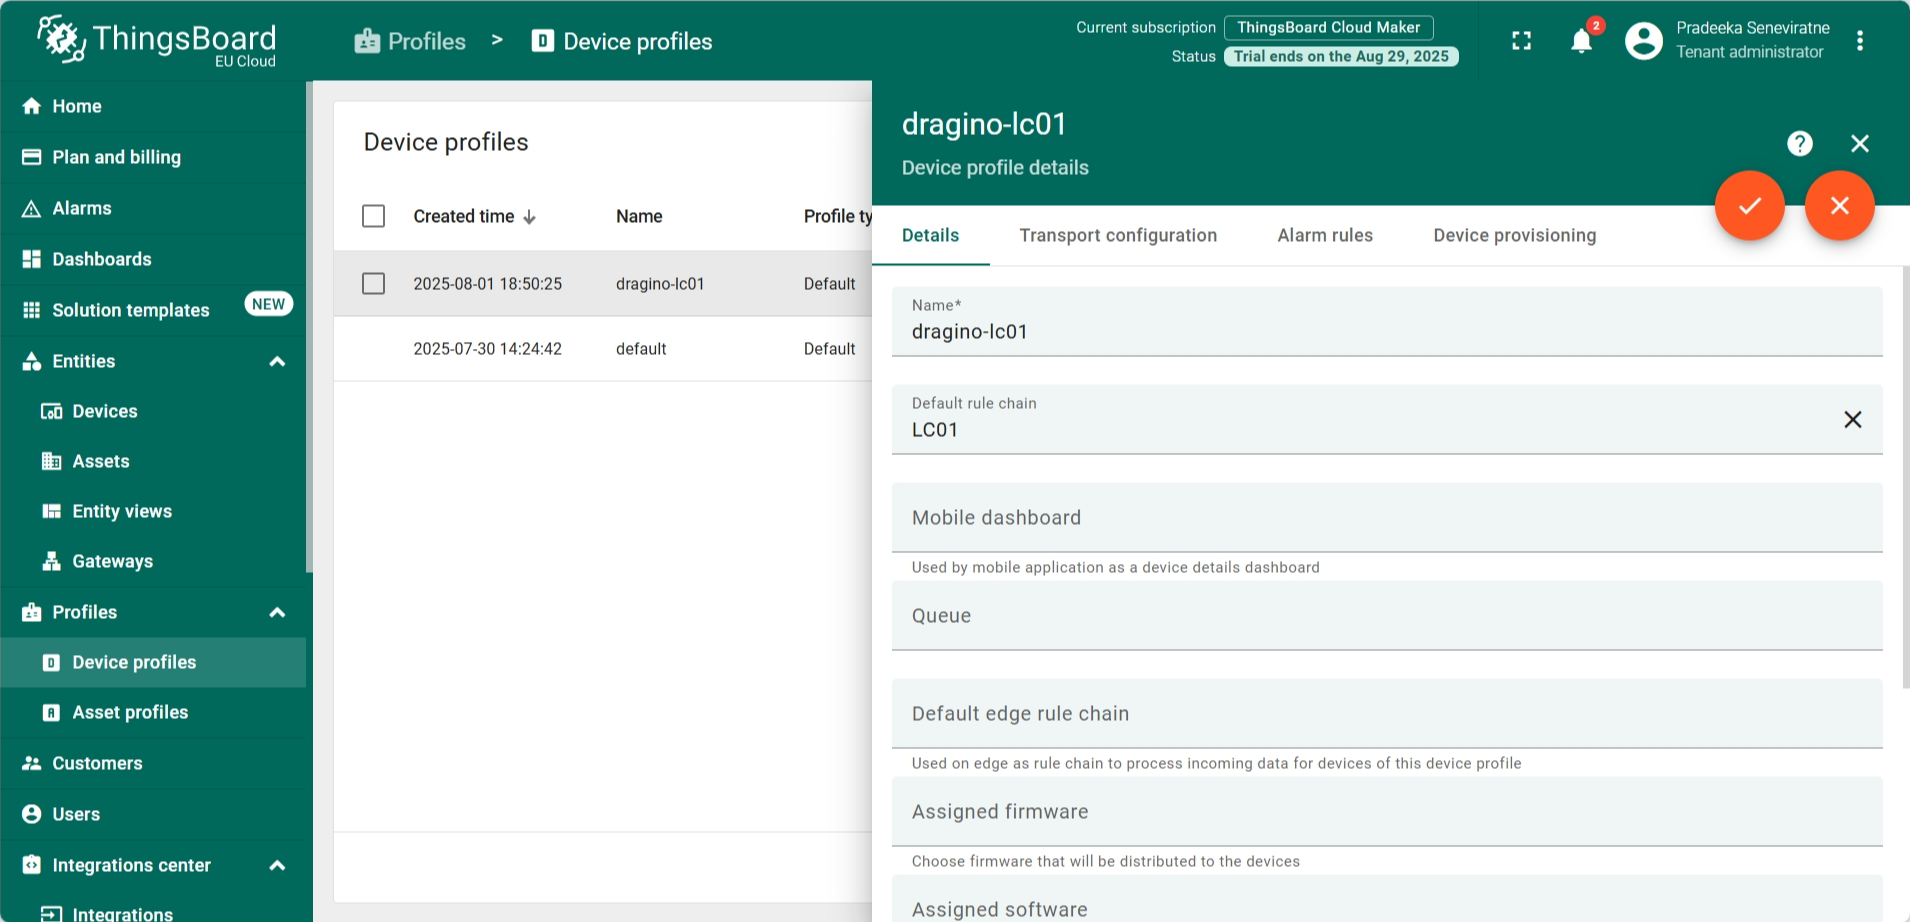
- The dragino-lc01 Device profile details window appears. Click on the Toggle edit mode button.
- Select LC01 from the Default rule chain. Then click on the Apply changes button.
Creating the dashboard
The ThingsBoard Dashboard is a visual interface that lets you monitor and control your IoT devices in real time. You can display data using charts, maps, gauges, and other widgets. Dashboards make it easy to see sensor values, device status, and alerts all in one place. You can also customize them to fit your specific needs and share them with others.
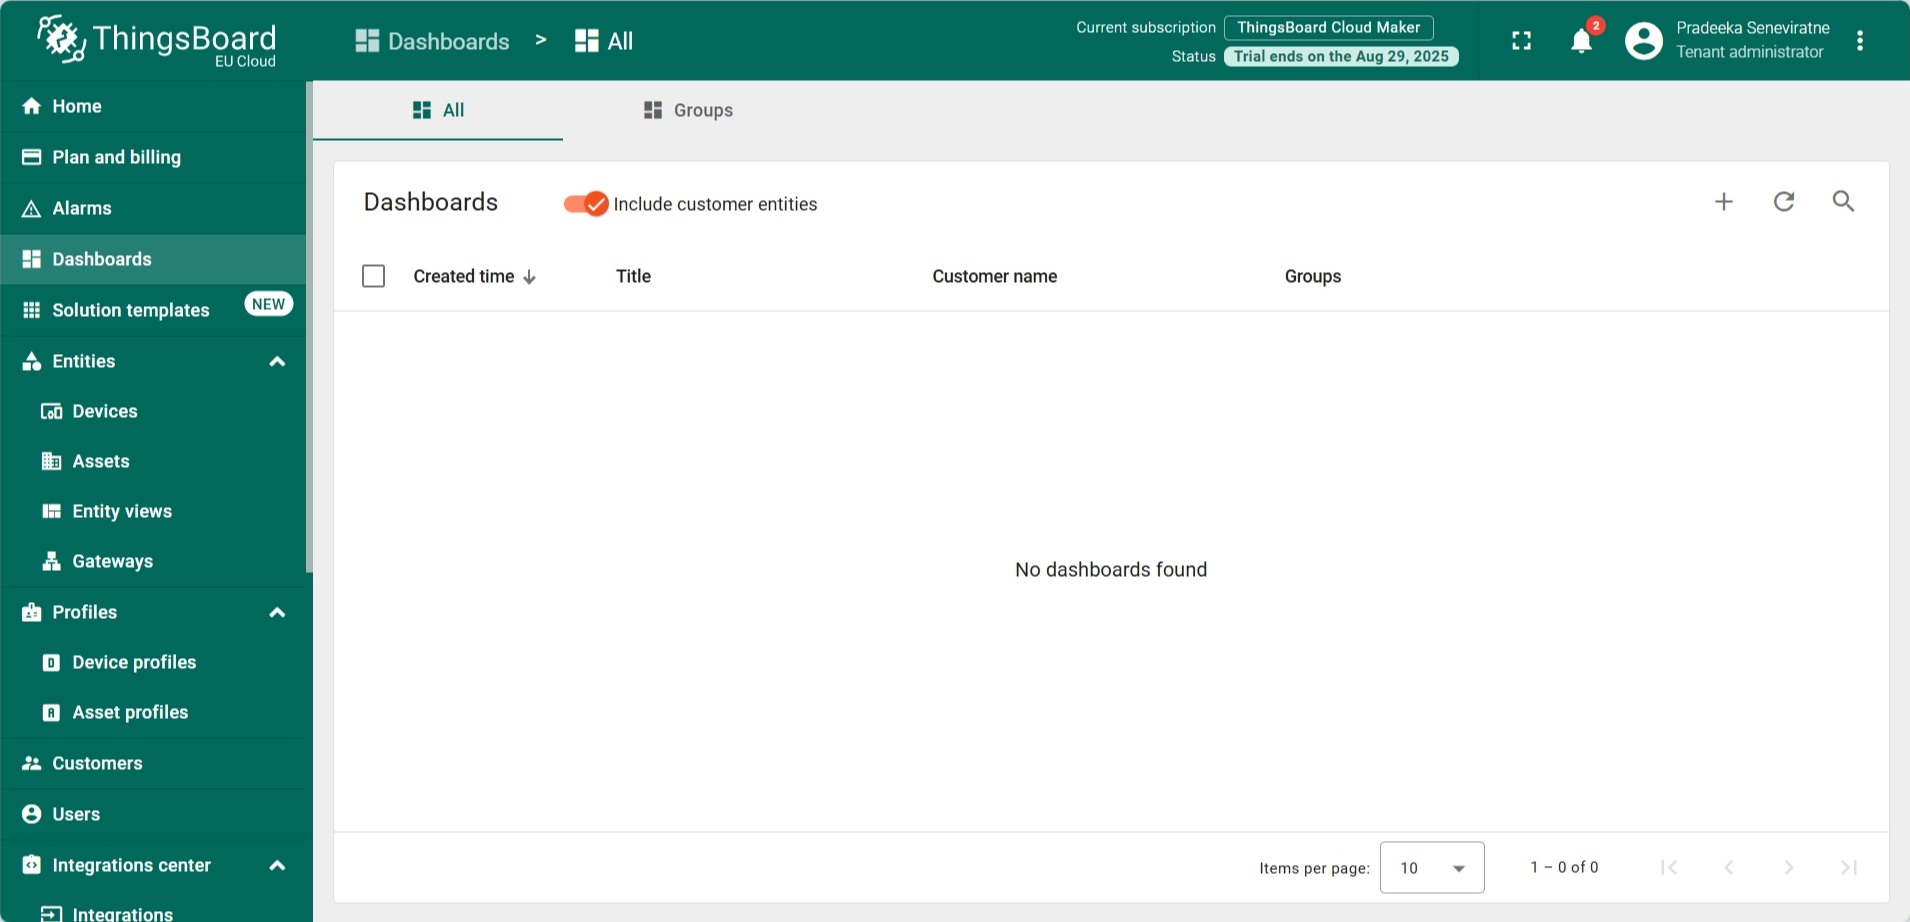
- In the left navigation menu, select Dashboards.
- On the Dashboards page, click the Add dashboard button (the one with the + sign). From the dropdown menu, select Import dashboard.
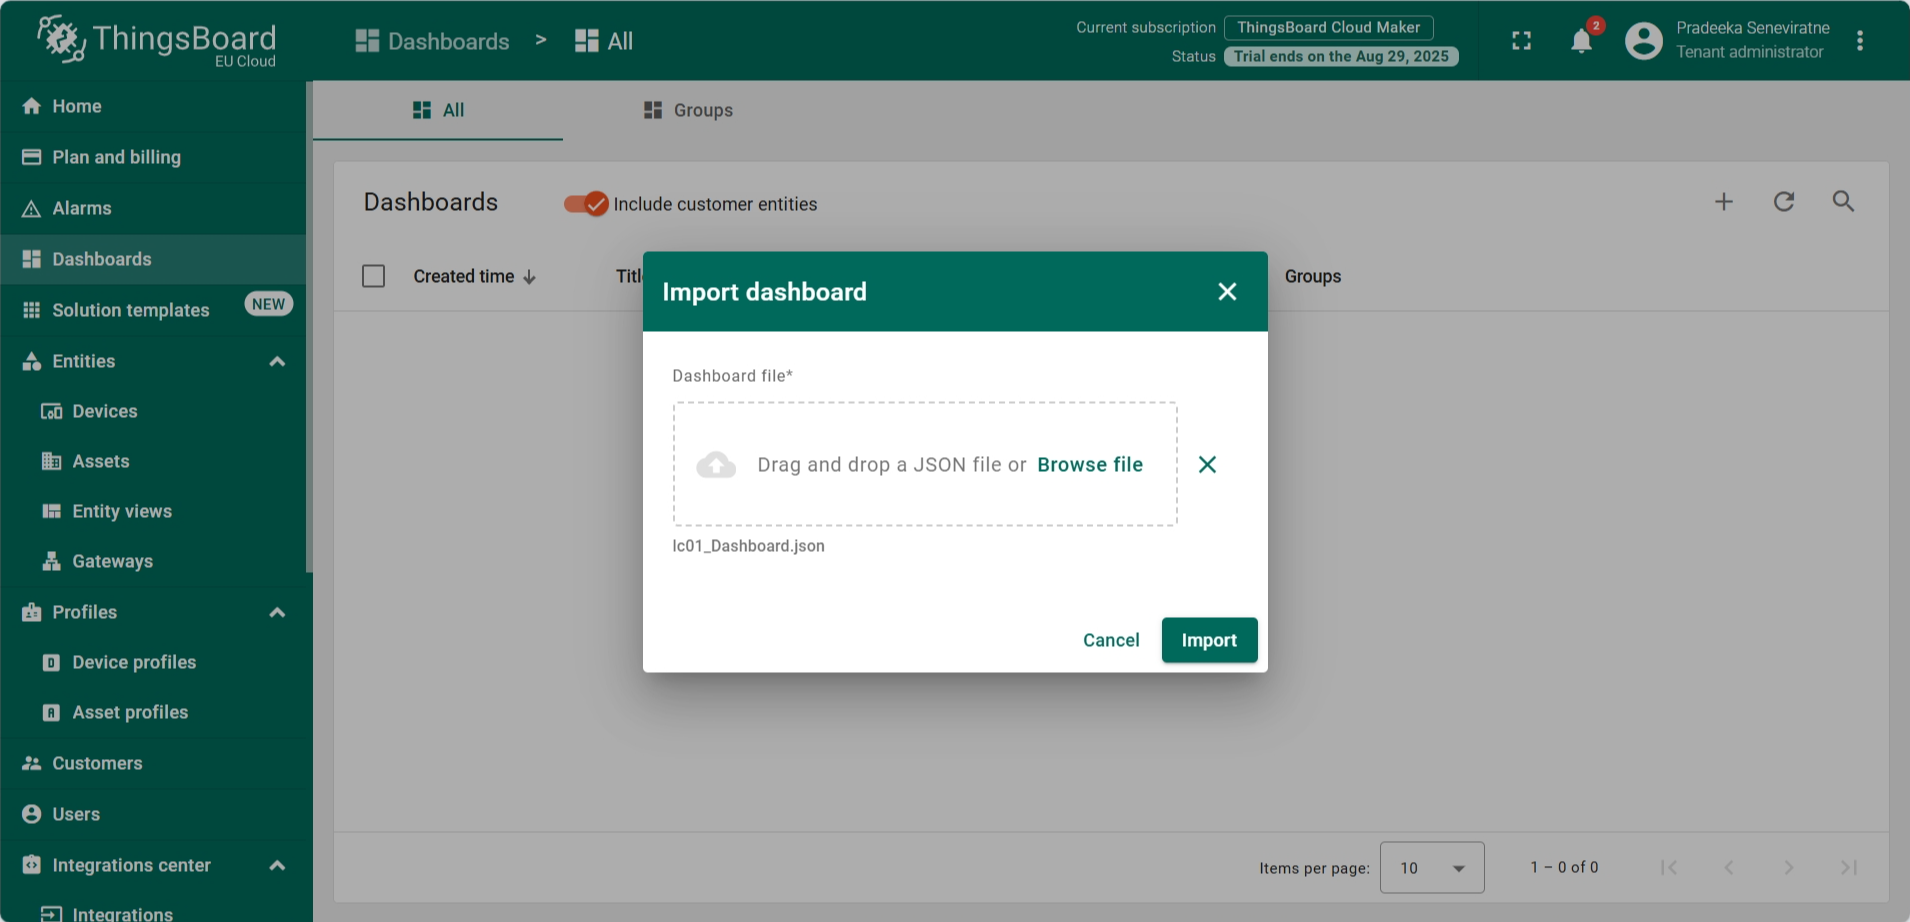
You can download the JSON file for LC01 dashboard here.
- Browse and locate the downloaded dashboard by selecting the Browse file.
- Click on the Import button.
- The dashboard has now been added to the Dashboards list.
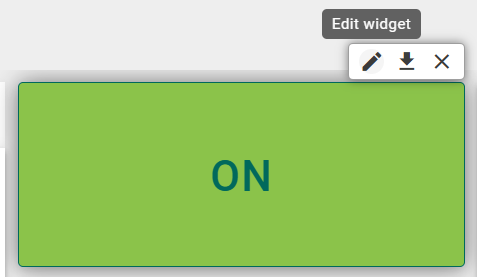
- Click the Edit mode button in the top-right of the window. The dashboard will turn into edit mode. When you mouse over a widget, you can see three buttons: Edit widget, Export widget, and Remove widget. Click on the Edit widget button of the first command button.
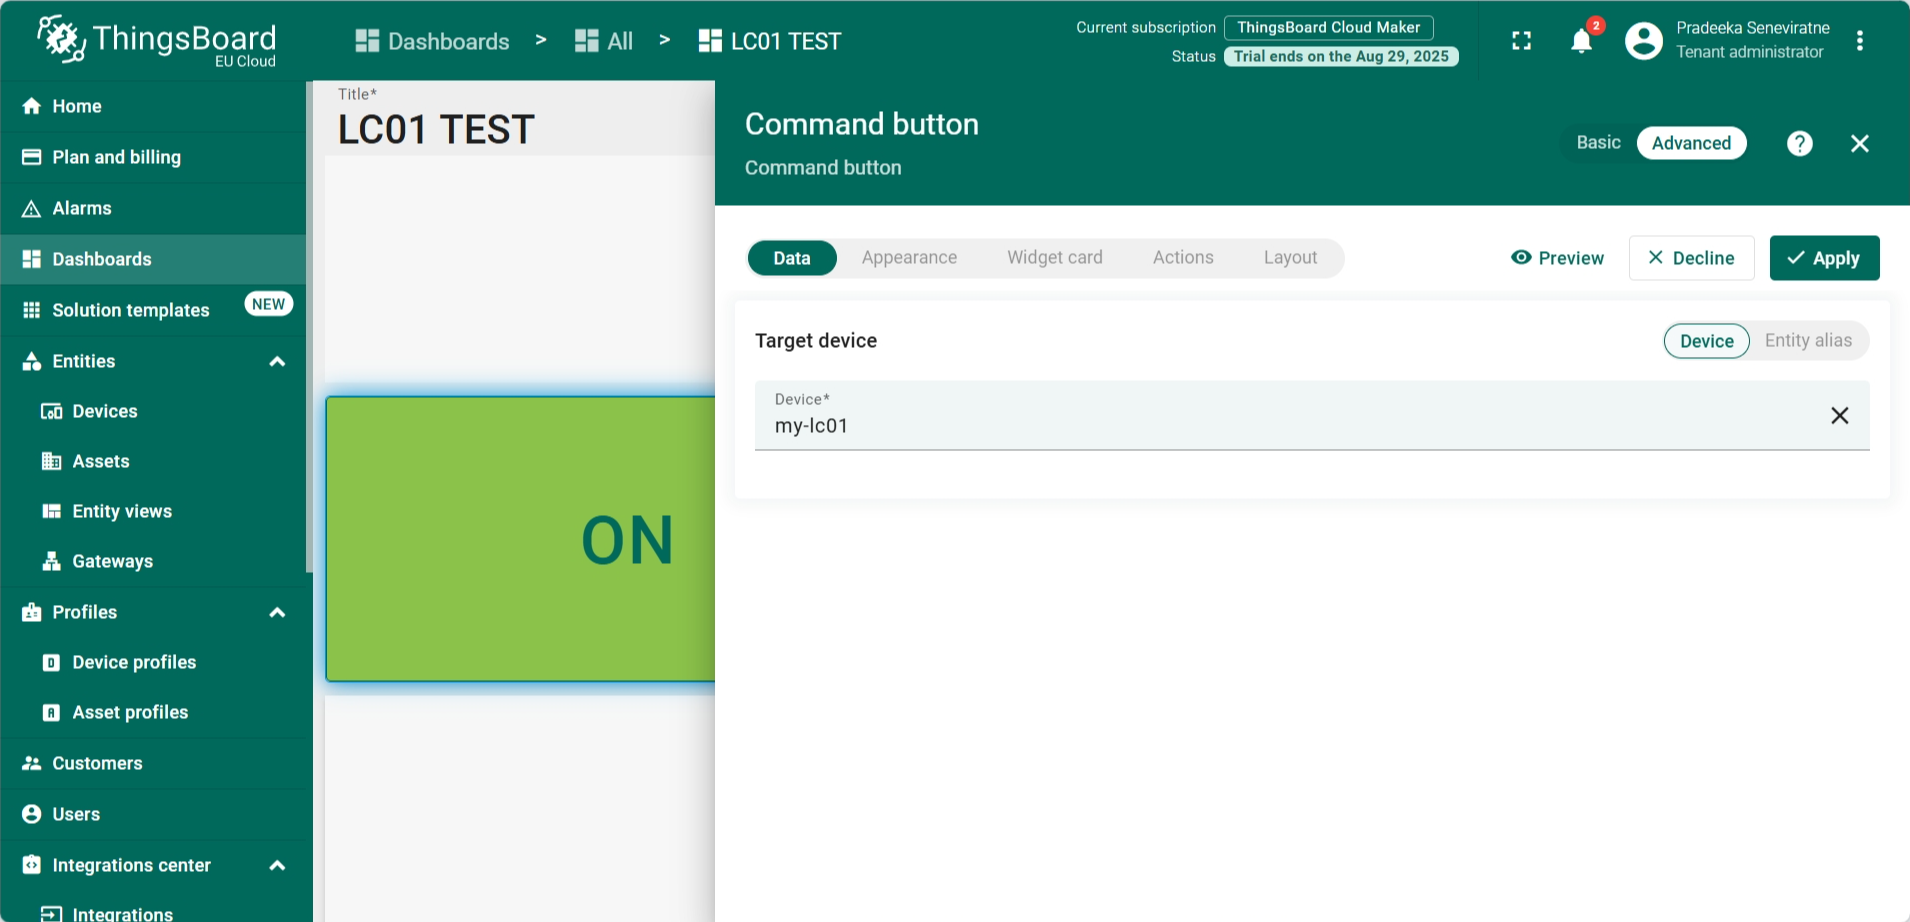
- The Command button configuration dialogbox appears:
- Target device: Select the Device' button.
- Device: Select my-lc01.
- Click on the Apply button.
Repeat the same for all other widgets. The configuration windows may diffrent for other widgets.
- After configuring all the widgtes, click on the Save button.
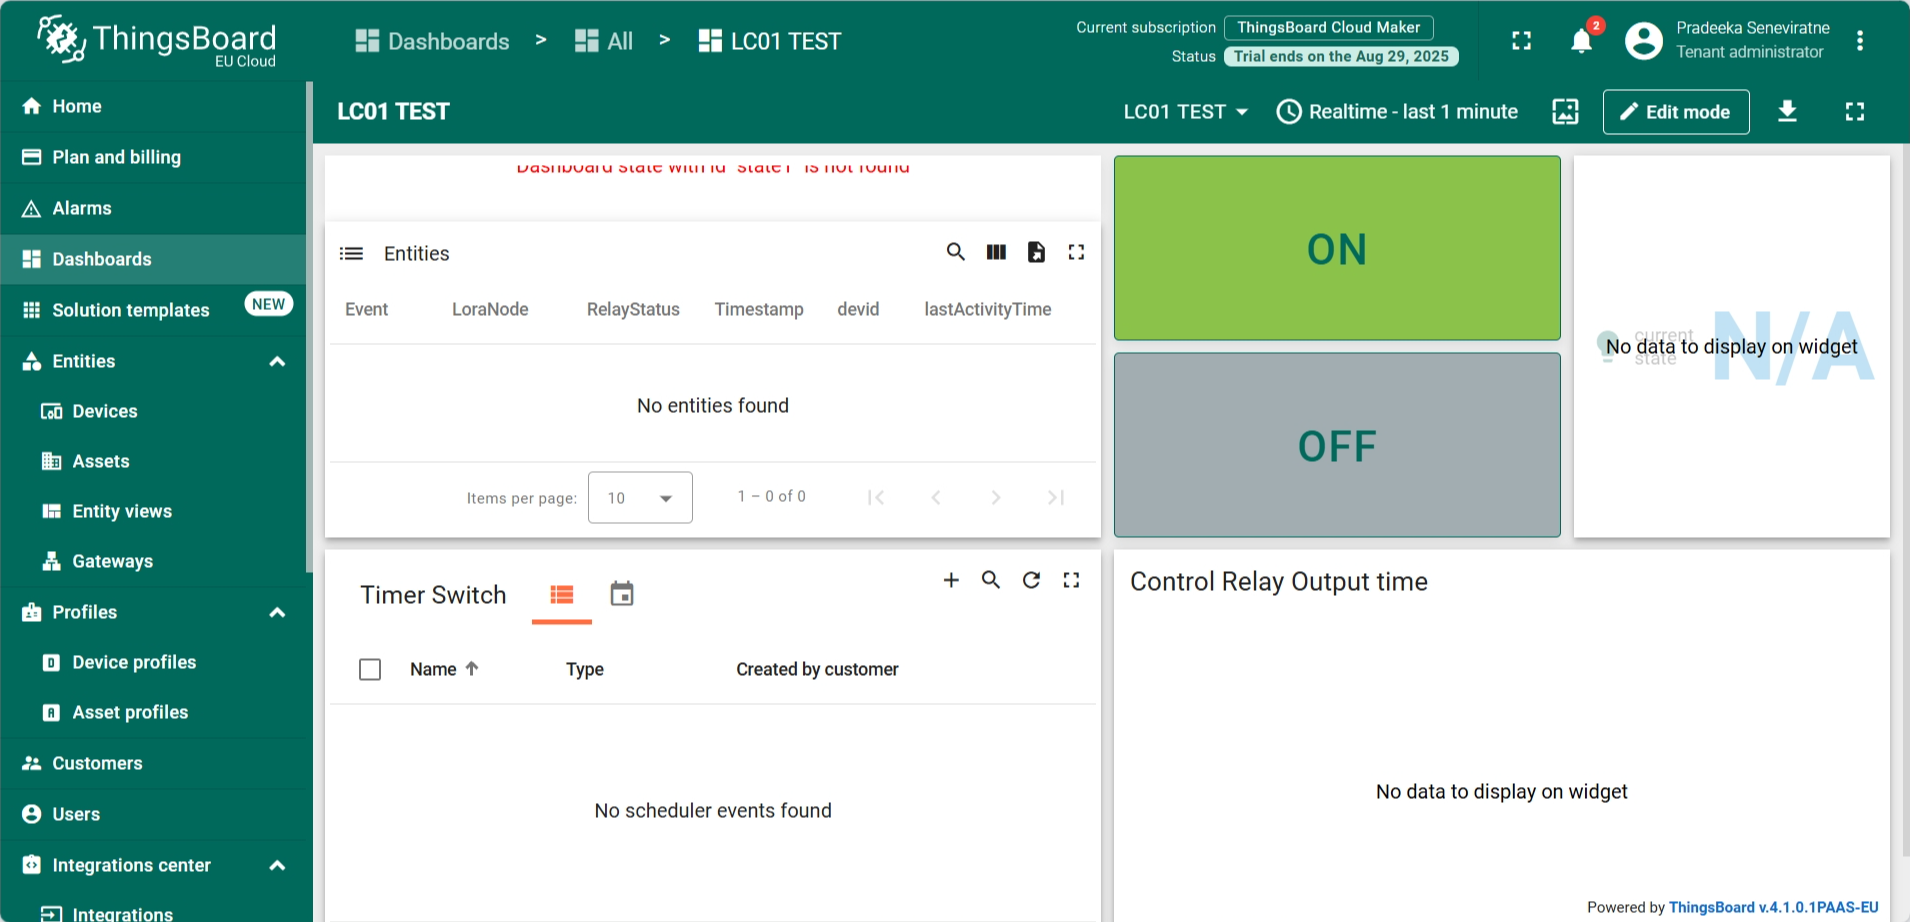
Now your dashboard should look someting like this:
Sending Downlinks from the Dashboard
The On and Off widgets of the dashboard generates downlink payloads that allows to control the LC01 relay. The generate downlinks can be view in The Things Stack Live data section.
- Click on the button ON widget of the dashboard. Your LC01 will turn ON.
- Then go to The Things Stack Live data section. You can see the sceduled downlink for your LC01 for that event.
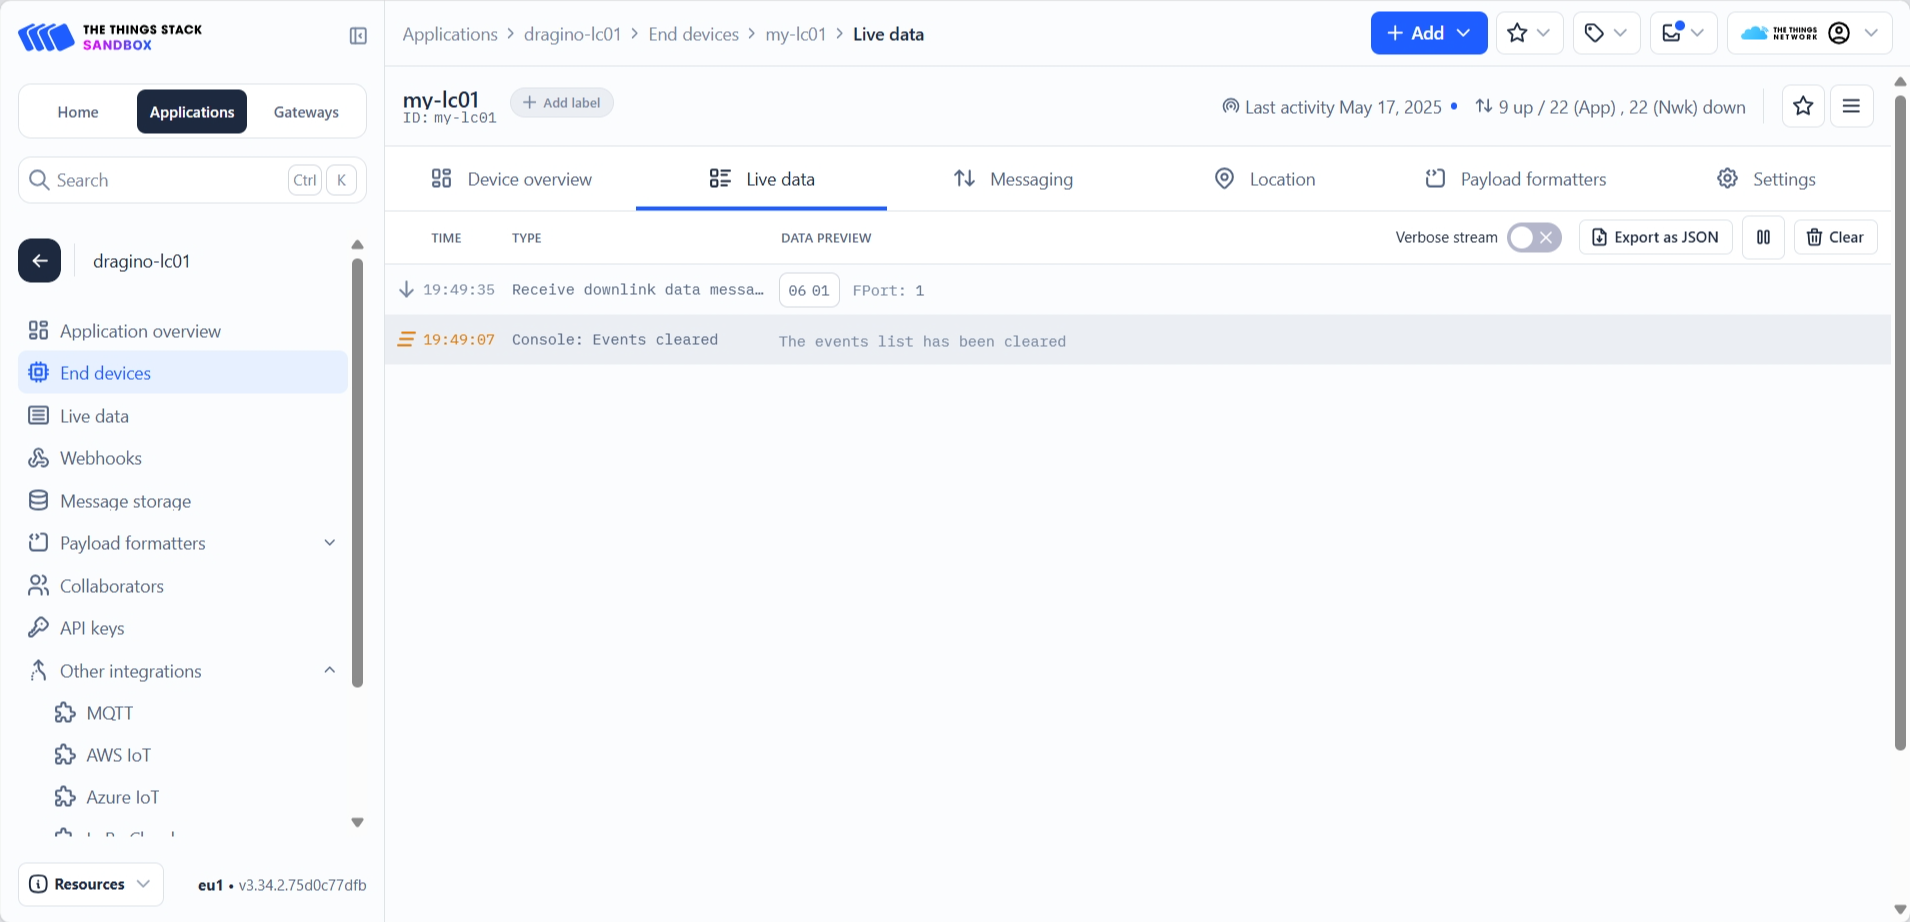
Click on the button OFF to turn off the relay.
You can see another downlink is scheduled for turn OFF the relay.
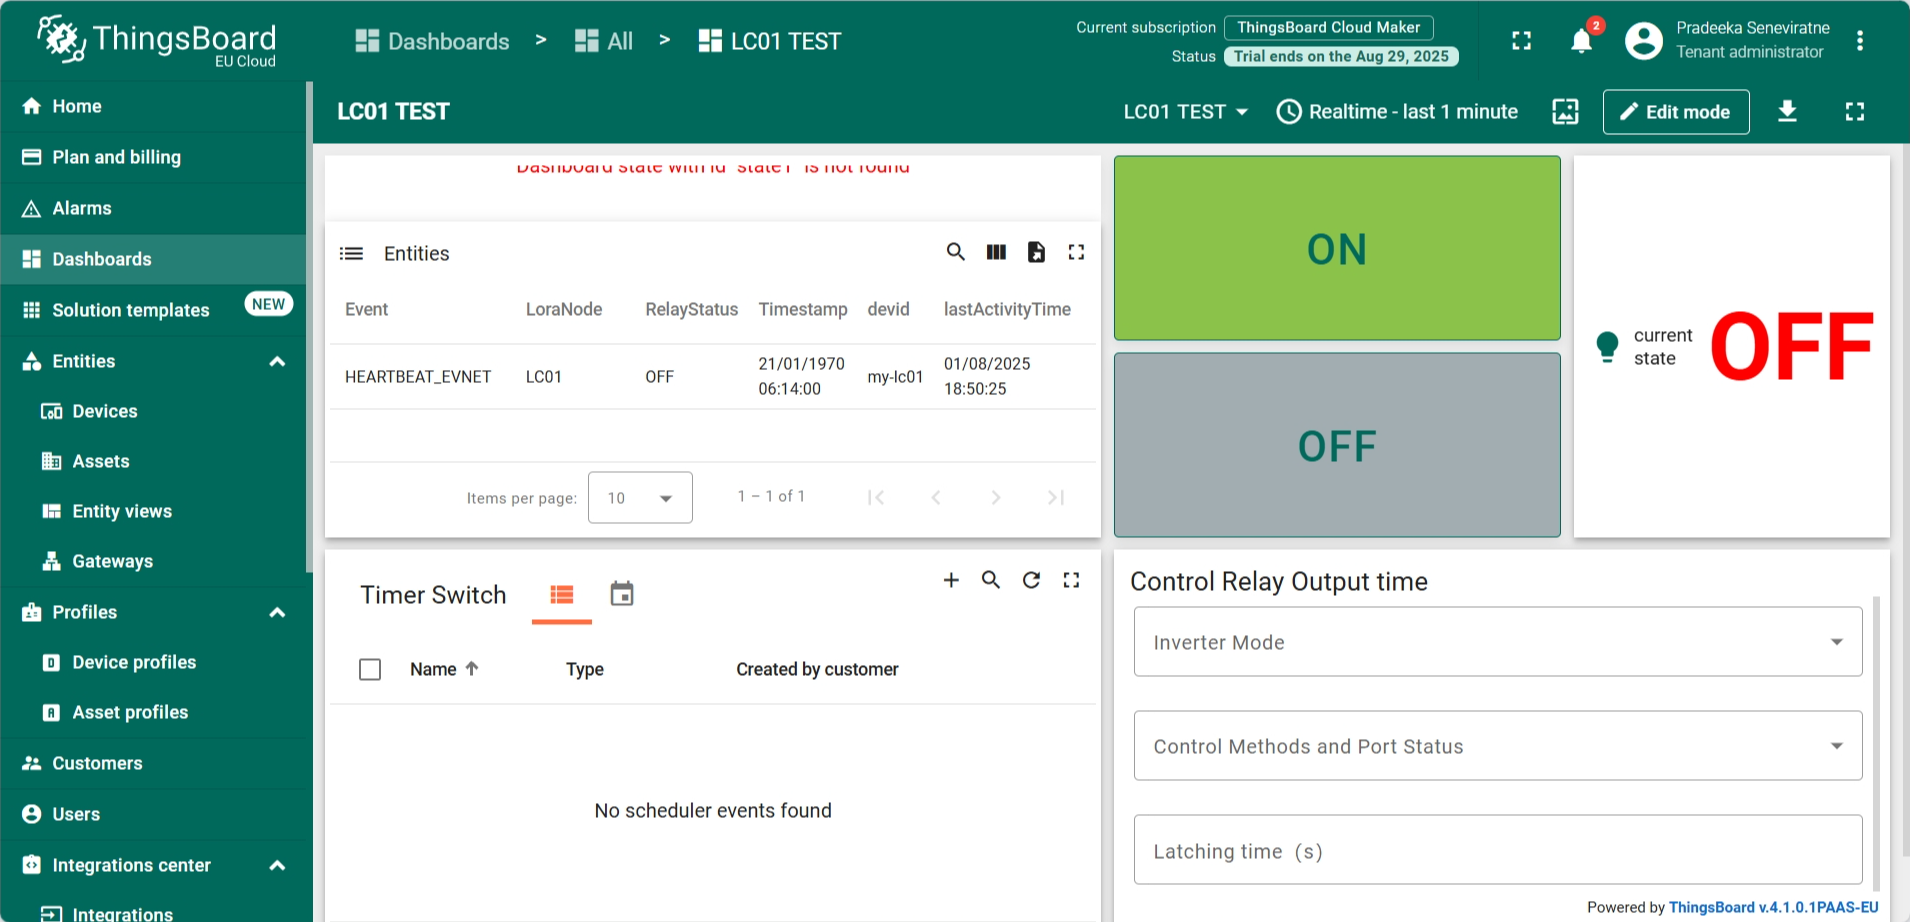
How to use the dashboard
- ON: Turns on the relay
- OFF: Turns off the relay
- Entities: Lists all the events such as uplinks, downlinks, heartbeats, etc.
- Timer Switch:
- Control relay output time: Allows to create scheduled relay control events using timer.